

Hyundai i10 Clutch Cable Adjustment Guide: Step-by-Step Instructions and Expert Tips
Maintaining your Hyundai i10’s clutch system is essential for smooth gear transitions, optimal engine performance, and long-term reliability. In this comprehensive guide, we explain how to adjust the clutch cable on a Hyundai i10, how to reset automatic and self-adjusting clutch systems, and the signs that indicate when your clutch cable needs replacement or calibration.
Content in this publication
- Understanding the Clutch Cable System
- Symptoms That Indicate You Need to Adjust the Clutch Cable
- How to Manually Adjust the Clutch Cable on a Hyundai i10
- How to Reset a Self-Adjusting or Automatic Clutch Cable
- Testing the Clutch Cable After Adjustment
- How a Hydraulic or Self-Adjusting Clutch Works
- Common Hyundai i10 Clutch-Related Problems
- How Often to Replace a Clutch Cable
- Driving With a Broken Clutch Cable
- Hard Clutch Pedal Causes
- Can a Tight Clutch Cable Cause Slipping?
- Ideal Clutch Pedal Height and Bite Point
- Hyundai i10 Reliability and Long-Distance Driving
- Final Thoughts
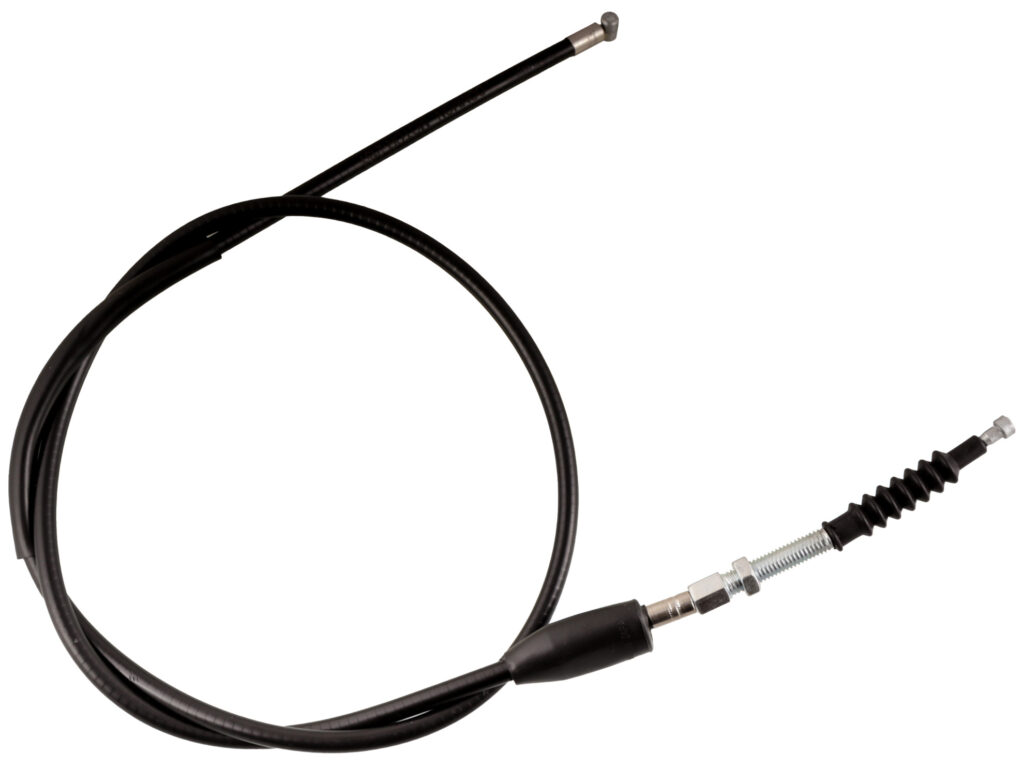
Understanding the Clutch Cable System
The clutch cable connects your i10’s clutch pedal to the clutch mechanism on the gearbox. Over time, cable stretch or component wear can alter the pedal height and bite point, making gear shifting harder or less precise. Proper adjustment ensures that the clutch engages and disengages smoothly, preventing unnecessary wear on the transmission.
Symptoms That Indicate You Need to Adjust the Clutch Cable
- Difficulty engaging gears — especially first or reverse.
- High clutch biting point, indicating excessive free play.
- Slipping clutch — engine revs increase but the car doesn’t accelerate properly.
- Hard clutch pedal — often caused by an overtightened cable or lack of lubrication.
- Burning smell — clutch friction surfaces overheating due to poor adjustment.
How to Manually Adjust the Clutch Cable on a Hyundai i10
Tools Required
- 10 mm and 12 mm wrenches
- A flashlight or headlamp
- Gloves for grip and protection
Adjustment Steps
- Switch off the engine and engage the parking brake for safety.
- Locate the clutch cable assembly—on the Hyundai i10, it’s usually found just above the battery compartment.
- Identify the adjuster nut and locknut on the threaded section of the cable, near the clutch fork.
- Loosen the locknut slightly to free the adjuster nut.
- Tighten or loosen the adjuster nut:
- Turning clockwise increases tension (reduces free play).
- Turning counterclockwise decreases tension (adds free play).
- Once you reach the desired tension, tighten the locknut to secure the setting.
- Test the clutch pedal—there should be about 10–15 mm of free play before the clutch starts to engage.
- Start the engine and check gear shifts. Adjust again if needed until you find the ideal pedal feel and engagement point.
How to Reset a Self-Adjusting or Automatic Clutch Cable
For models equipped with a self-adjusting clutch cable (part number GCC3106):
- Insert the inner cable into the outer sleeve until you hear a click.
- Ensure it locks fully in position by pushing it firmly until it reaches the stop.
- Reset the internal adjuster mechanism by pressing the two cable halves together.
- Reinsert the cable assembly into its mount and confirm that the adjustment mechanism moves freely.
Tip: Always reset the clutch cable before reinstalling it after service or replacement to ensure proper pedal height.
You may be interested in readingHow to Replace the Battery in a Hyundai i10: Complete Step-by-Step Guide
Testing the Clutch Cable After Adjustment
- Operate the pedal by hand. The movement should be smooth and free from resistance.
- Inspect the outer cable for bends, kinks, or cracks—replace if damaged.
- Check inner wire strands. If even one strand is frayed, the entire cable must be replaced.
- Once confirmed, reconnect the gearbox end and re-verify the clutch pedal free play.
How a Hydraulic or Self-Adjusting Clutch Works
In some Hyundai i10 variants, a hydraulic clutch replaces the mechanical cable system. Hydraulic clutches use fluid pressure to engage and disengage the clutch, automatically compensating for wear. However, if the system feels soft or inconsistent, air or leaks in the hydraulic line may be the cause and require bleeding or service.
| Problem | Possible Cause | Recommended Action |
|---|---|---|
| Hard clutch pedal | Worn pivot ball or cable friction | Lubricate or replace cable |
| Slipping clutch | Over-tightened cable | Readjust free play |
| Clutch pedal sinks | Broken cable or linkage | Replace immediately |
| Noise when pressing pedal | Damaged release bearing | Inspect clutch assembly |
| Difficulty shifting into reverse | Incorrect adjustment | Readjust clutch cable |
How Often to Replace a Clutch Cable
A clutch cable typically lasts 2–5 years, depending on driving conditions. However, inspect it during every major service. Replace it immediately if:
- The pedal feels excessively stiff or spongy.
- The clutch does not disengage properly.
- The cable housing is frayed or corroded.
Pro Tip: Periodic lubrication of the cable ends can significantly extend its service life.
Driving With a Broken Clutch Cable
Driving a Hyundai i10 with a broken clutch cable is not recommended. While you can technically shift gears without a clutch using careful rev-matching, doing so risks severe gearbox and synchro damage. Replace the cable before resuming normal driving.
You may be interested in readingHow to Replace the Battery in a Hyundai i10: Complete Step-by-Step GuideYou may be interested in reading
 Hyundai i10 Daytime Running Light Bulb Replacement – Complete Step-by-Step Guide
Hard Clutch Pedal Causes
- Worn clutch release bearing
- Damaged cross-shaft or pivot ball
- Frayed cable strands increasing internal friction
- Faulty master/slave cylinder (in hydraulic systems)
Can a Tight Clutch Cable Cause Slipping?
Yes. An overly tight clutch cable keeps partial tension on the clutch plate, preventing full engagement. Symptoms include:
- Burning odor from clutch friction
- Engine revs rising without acceleration
- Reduced power transfer efficiency
Loosening the cable slightly can resolve this and restore proper clutch bite.
Ideal Clutch Pedal Height and Bite Point
The clutch pedal should align evenly with the brake pedal in height. The bite point typically occurs midway through the pedal’s travel, offering the driver smooth engagement and control. Adjustments beyond this range may indicate underlying wear in the clutch components.
Hyundai i10 Reliability and Long-Distance Driving
The Hyundai i10 is praised for its dependability and low maintenance costs. When properly maintained, it delivers excellent reliability in both urban traffic and long highway journeys. Routine clutch inspections every 10,000 km ensure continued performance and prevent sudden cable failures.
You may be interested in readingHow to Replace the Battery in a Hyundai i10: Complete Step-by-Step GuideYou may be interested in reading
Hyundai i10 Daytime Running Light Bulb Replacement – Complete Step-by-Step GuideYou may be interested in reading
 How to Replace the Hyundai i10 Key Fob Battery
Final Thoughts
Proper clutch cable adjustment is key to keeping your Hyundai i10’s transmission smooth and responsive. Regular inspection, correct tensioning, and timely replacement of worn parts ensure consistent performance and prevent costly gearbox repairs. By following these steps, you’ll restore the perfect pedal feel and enjoy confident shifting on every drive.
If you want to know other articles similar to Hyundai i10 Clutch Cable Adjustment Guide: Step-by-Step Instructions and Expert Tips you can visit the category Service and Parts.
Vauxhall Meriva Engine Management Light: Causes, Checks, and Fixes
Vauxhall Meriva Key Fob Replacement: Complete Guide
Vauxhall Meriva Tyre Size: Complete Fitment Guide
Vauxhall Meriva Engine Light: Causes, Diagnosis, and Fixes
Vauxhall Meriva Engine Oil: Complete Selection and Maintenance Guide
Vauxhall Meriva Code 82 Reset: Meaning, Steps, and Fixes
Leave a Reply
More content of your interest