

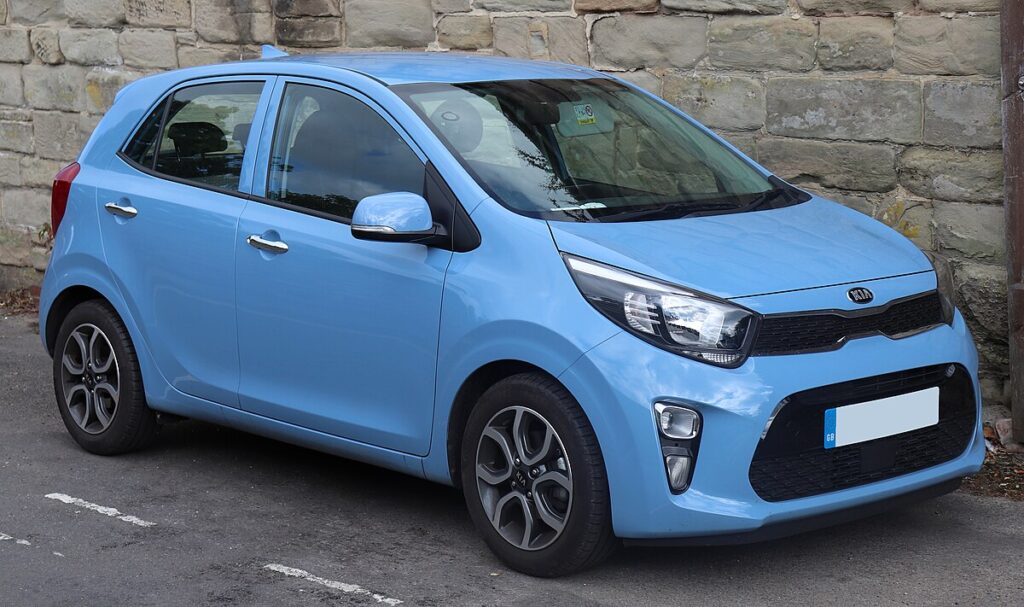
Kia Picanto Handbrake Adjustment: The Complete Guide for Smooth, Safe Braking
When our Kia Picanto’s handbrake begins to feel loose, spongy, or requires an Everest-level pull to secure the car on a hill, it’s a sign the system needs attention. And trust us — nothing drains confidence behind the wheel like a handbrake that feels more decorative than functional. So today, we’re diving deep into the world of Kia Picanto handbrake adjustment, building an article that doesn’t just inform, but actually helps you do the job confidently.
This is an in-depth, street-friendly breakdown shaped to outperform competitor pages by being more practical, more structured, and far more readable — written with a relaxed, conversational edge (like grabbing car-care advice from a knowledgeable friend over coffee). Let’s roll.
Content in this publication
- Why Your Kia Picanto’s Handbrake Needs Adjusting
- How the Kia Picanto’s Handbrake System Works
- Tools You’ll Need for a Proper Adjustment
- Preparing the Car Safely
- Step-by-Step: Adjusting the Kia Picanto Handbrake
- Step 1: Access the Handbrake Adjustment Nut
- Step 2: Loosen the Locknut (If Present)
- Step 3: Tighten the Handbrake Cable
- Step 4: Check Wheel Locking Balance
- Step 5: Adjust Rear Drum Brake Shoes (If Required)
- Step 6: Recheck the Handbrake Lever Travel
- Step 7: Reassemble the Centre Console
- Common Mistakes People Make When Adjusting the Picanto Handbrake
- Symptoms That Indicate a Bigger Problem
- How Often Should You Adjust the Handbrake?
- Kia Picanto Handbrake System Life Expectancy
- Should You Replace the Handbrake Cable Instead?
- Professional Adjustment vs DIY: What’s Best?
- Preventive Tips to Keep the Handbrake Working Perfectly
- Conclusion: A Confidently Tight, Reliable Kia Picanto Handbrake
- FAQs
Why Your Kia Picanto’s Handbrake Needs Adjusting
A handbrake (or parking brake) is one of those things we rarely think about — until we absolutely must. Over time, cables stretch, brake shoes wear, or components settle out of alignment.
Common signs the handbrake needs attention include:
- More than 6–8 clicks to fully engage
- Weak braking hold on hills
- Spongy, uneven pull
- One wheel locking while the other stays free
- MOT/inspection warnings about parking brake efficiency
We often tell people: the handbrake is the quiet hero of your car. When it stops acting heroic, it’s time for a tune-up.
How the Kia Picanto’s Handbrake System Works
Before adjusting anything, we need to understand what we’re actually adjusting. The Picanto uses a cable-operated handbrake system, which pulls mechanical levers on the rear brakes.
Key Components Involved
- Handbrake lever — inside the cabin
- Adjustment nut — under the centre console
- Handbrake cable — running to rear brakes
- Rear drums or rear discs (depending on model year)
- Brake shoes or calipers
Why This Matters
Most of the adjustment happens at the lever (through the adjustment nut), but if the rear brakes are worn or maladjusted, tightening the nut alone becomes a temporary fix — like putting a plaster on a broken bone.
Tools You’ll Need for a Proper Adjustment
No complicated workshop gear required — just a simple toolkit and a bit of patience.
Essential DIY Tools
- 10mm spanner or socket
- Flathead screwdriver
- Torx driver (depending on console screws)
- Wheel chocks
- Gloves
- Flashlight
Optional but Useful
- Jack and axle stands (if checking rear brakes)
- Brake cleaner
- Copper grease (light application only)
Sometimes the hardest “tool” is willingness, but you’re already here — so that’s sorted.
Preparing the Car Safely
Anything involving a braking system demands respect. These steps keep everything safe and controlled.
Safety Checklist
- Park on a flat surface
- Engage a gear (manual) or set to Park (automatic)
- Place wheel chocks behind tyres
- Switch off the engine
- Apply the handbrake lightly (not fully engaged)
We’re not trying to create drama; safety just makes everything smoother.
Step-by-Step: Adjusting the Kia Picanto Handbrake
This section is the heart of the guide. Follow it slowly, like reading a treasure map.
Step 1: Access the Handbrake Adjustment Nut
The adjustment nut lives under the centre console. Depending on your Picanto model, removing the plastic trim may require:
- Removing two screws at the front of the console
- Lifting the rear cupholder section
- Prying gently with a flathead
Once removed, the handbrake lever mechanism is revealed like a mechanical skeleton — complete with the star of the show: the 10mm handbrake adjustment nut.
Step 2: Loosen the Locknut (If Present)
Not all Picantos have a locknut, but if yours does:
- Hold the main nut in place
- Loosen the locknut using a secondary spanner
Think of this as unlocking a stubborn vault.
Step 3: Tighten the Handbrake Cable
Turn the adjustment nut clockwise. Go slowly — three or four turns can make a big difference.
You may be interested in reading Kia Picanto Key Battery Replacement: The Complete, Stress-Free Owner’s Guide
What You’re Aiming For
- Handbrake should lock firmly at 5–7 clicks
- Rear wheels should not spin freely when pulled
How to Test This
Lift the handbrake slightly, spin the rear wheels, then adjust until resistance is firm.
Step 4: Check Wheel Locking Balance
A properly adjusted handbrake locks both rear wheels evenly.
How to Check
- Lift one rear wheel (if you have stands)
- Pull handbrake 4–6 clicks
- Attempt to spin the wheel
Repeat on the other side.
If one wheel spins freely, the rear brakes need individual adjustment at the drums — not just the cable.
Step 5: Adjust Rear Drum Brake Shoes (If Required)
Some Kia Picantos use rear drum brakes, which have an internal self-adjuster. But self-adjusters don’t always “self-adjust” — especially after years of real-world abuse.
Manual Shoe Adjustment
- Remove the wheel
- Remove the drum
- Locate the star wheel adjuster
- Turn it a few clicks until the drum just begins to drag
- Reinstall drum and wheel
If the shoes are too loose, the cable compensation becomes excessive. Get the shoes right — then fine-tune the cable.
Step 6: Recheck the Handbrake Lever Travel
After adjusting the shoes and cable:
- Pull the lever fully
- Count the clicks
- Test hill-hold on a gentle incline
You want solid holding power by the fifth or sixth click — not a workout routine.
Step 7: Reassemble the Centre Console
Once happy with the adjustment:
- Tighten the locknut if fitted
- Reinstall the console trim
- Reinstall screws
- Wipe down fingerprints (optional but satisfying)
And just like that — the handbrake feels brand new.
Common Mistakes People Make When Adjusting the Picanto Handbrake
This is where many DIY jobs go off the rails.
Mistake 1: Overtightening the Cable
Tightening excessively causes:
- Dragging brakes
- Overheated drums
- Fast brake shoe wear
The goal is balance, not maximum tension.
Mistake 2: Ignoring Worn Brake Shoes
People sometimes assume a tighter cable equals a stronger brake. It doesn’t — worn shoes need replacement, not tension.
Mistake 3: Adjusting Only One Side
If one wheel is tighter than the other, the car may pull during braking.
Mistake 4: Not Testing on a Hill
Driveway tests lie. Hills tell the truth.
Symptoms That Indicate a Bigger Problem
Sometimes poor performance is not just adjustment.
You may be interested in readingKia Picanto Key Battery Replacement: The Complete, Stress-Free Owner’s GuideYou may be interested in reading
 Volkswagen T-Cross Boot Size: The Complete, No-Nonsense Guide for Real-World Use
Watch Out For
- Grinding noises → worn shoes or drums
- Uneven braking → seized wheel cylinder or caliper
- Burning smell → dragging brakes
- Floppy handbrake lever → snapped cable
If you notice these, we’re stepping beyond DIY territory.
How Often Should You Adjust the Handbrake?
The Kia Picanto typically needs handbrake readjustment:
- Every 12 months
- After replacing rear brake shoes or pads
- After servicing rear drums
- When the cable stretches
Small car + mechanical cable = occasional tweaks.
Kia Picanto Handbrake System Life Expectancy
Here’s what you can expect under normal use:
- Handbrake cable: 5–10 years
- Drum brake shoes: 30,000–60,000 miles
- Rear pads (disc models): 20,000–40,000 miles
Aggressive hill parking or constant city driving reduces lifespan.
Should You Replace the Handbrake Cable Instead?
If the cable is stretched beyond adjustment or shows corrosion, replacement is cheap insurance.
Signs You Need a New Cable
- Maximum adjustment still too loose
- Frayed strands visible
- Rusted outer casing
- Lever travel extremely high
Cables are inexpensive and transform braking feel dramatically.
Professional Adjustment vs DIY: What’s Best?
We love DIY, but we also appreciate a good mechanic. Here’s a quick comparison.
DIY Pros
- Saves money
- You understand your car better
- Immediate fix at home
DIY Cons
- Requires patience
- Centre console removal can feel fiddly
Professional Pros
- Thorough inspection
- Tools and expertise
- Guaranteed adjustment
Professional Cons
- Labour cost
- You might be upsold parts you don’t need
If you’re mechanically confident, this job is one of the easiest on the Picanto.
Preventive Tips to Keep the Handbrake Working Perfectly
A few simple habits keep the system sharp:
- Don’t yank the lever like starting a lawnmower
- Use footbrake first before applying handbrake
- Avoid driving with handbrake partially engaged
- Keep rear brakes in good shape
- Service drums and adjusters annually
Small steps = long handbrake life.
Conclusion: A Confidently Tight, Reliable Kia Picanto Handbrake
Adjusting your Kia Picanto handbrake isn’t just a maintenance task — it’s peace of mind wrapped in bolts and springs. When the lever feels right, the car feels safer. We hope this guide gave you everything you need: from understanding the system, to adjusting it accurately, to diagnosing deeper issues.
A well-adjusted handbrake is like a solid handshake — firm, reassuring, and something you instantly notice when it isn’t right.
FAQs
1. How many clicks should the Kia Picanto handbrake have?
Ideally 5–7 clicks for a firm, effective hold.
2. Why does my handbrake feel loose even after adjustment?
Likely worn brake shoes, seized adjusters, or cable stretch beyond limits.
3. Can I adjust the handbrake without removing the centre console?
No — the adjustment nut sits under the console trim.
4. Why does one wheel lock before the other?
The drum shoes or caliper on one side may need individual adjustment or repair.
You may be interested in readingKia Picanto Key Battery Replacement: The Complete, Stress-Free Owner’s GuideYou may be interested in reading
Volkswagen T-Cross Boot Size: The Complete, No-Nonsense Guide for Real-World UseYou may be interested in reading
Volkswagen T-Cross Tyre Pressure Guide (Official PSI for All Wheel Sizes)5. Is this job suitable for beginners?
Yes — with patience and a good guide (like this one), it’s beginner-friendly.
If you want to know other articles similar to Kia Picanto Handbrake Adjustment: The Complete Guide for Smooth, Safe Braking you can visit the category Service and Parts.
Chevrolet Malibu Engine Options: A Complete Guide to Power, Performance, and Efficiency
Chevrolet Malibu Boot Space: A Complete Guide to Trunk Capacity, Practicality, and Everyday Use

How Much Does Nissan Altima Weigh? Complete Weight Guide by Model Year and Trim
Nissan Altima Battery Size: Complete Guide to Choosing the Right Battery
Nissan Altima Tank Size: Everything You Need to Know About Fuel Capacity and Driving Range
Nissan Altima Oil Type: The Complete Guide to Choosing the Right Engine Oil
Leave a Reply
More content of your interest