
Mazda 3 Rear Brake Pad Replacement: The Complete DIY & Cost Guide
Content in this publication
- Understanding Why Rear Brake Pads Matter
- Signs Your Mazda 3 Needs New Rear Brake Pads
- Why Rear Pads Wear Differently Than Front Pads
- Tools You’ll Need For Mazda 3 Rear Brake Pad Replacement
- Mazda 3 Rear Brake Pad Specifications
- Safety First: Precautions We Should Always Take
- Step-by-Step Guide: Mazda 3 Rear Brake Pad Replacement
- Step 1: Prepare the Vehicle
- Step 2: Disable the Electronic Parking Brake (EPB)
- Step 3: Remove the Caliper
- Step 4: Compress the Caliper Piston
- Step 5: Clean & Prepare the Brake Assembly
- Step 6: Install the New Rear Brake Pads
- Step 7: Reassemble the Caliper
- Step 8: Reactivate the EPB System
- Step 9: Reinstall the Wheel
- Step 10: Bedding-In Procedure (Vital Yet Overlooked)
- Professional vs. DIY: What’s the Cost?
- Choosing the Best Replacement Brake Pads
- Common Mistakes We Avoid
- Maintenance Tips to Make Pads Last Longer
- Final Thoughts
- FAQs
Understanding Why Rear Brake Pads Matter
When we talk about the Mazda 3, we’re talking about a car that blends sharp handling with everyday practicality. Yet even the most disciplined drivers eventually face one unavoidable maintenance job: rear brake pad replacement. It’s one of those tasks that sneaks up on us—silent, slow, and inevitable—until one day the unmistakable squeal or grinding noise arrives like a rude alarm clock.
Rear brake pads do more than simply help slow the vehicle; they stabilize the chassis, assist with emergency stops, support the rear brake calipers, and ensure that overall braking balance feels natural and safe. When these pads wear down, the Mazda 3 starts whispering little clues: softer pedal feel, scraping noises, longer stopping distances, or that dreaded dashboard brake warning light.
Replacing the rear pads may feel intimidating, but once we break it down step-by-step, the whole job becomes surprisingly manageable—even therapeutic.
Let’s dig into everything from symptoms to tools, from torque specs to step-by-step removal and installation, and from professional pricing to DIY cost-cutting tips.
Signs Your Mazda 3 Needs New Rear Brake Pads
The Usual Warning Signs
We often know something is up long before we pop the wheel off. Typical symptoms include:
- Squealing or screeching noise when braking
- Grinding sound (a sign the pads are beyond worn)
- Increased stopping distance
- Vibration through the pedal
- Brake warning light illuminated
- Thin pads visible through the wheel
- Uneven braking feel or a pull to one side
Mileage-Based Expectations
Mazda 3 rear brake pads generally last between:
- 25,000–50,000 miles for normal mixed driving
- 15,000–25,000 miles for aggressive city drivers
- 50,000+ miles for mostly highway use
Road conditions, driving style, and brake material all play major roles here.
Why Rear Pads Wear Differently Than Front Pads
Front pads take a majority of the braking force—often up to 70%—but the rear pads still work hard. In the Mazda 3, especially models with electronic parking brakes (EPB), the rear system wears differently due to:
- Additional strain from parking brake activation
- Stability control and traction control intervention
- Weight distribution during braking
- Smaller pad size compared to the front
This all means the rear pads often surprise us with faster wear than expected.
Tools You’ll Need For Mazda 3 Rear Brake Pad Replacement
Replacing the pads isn’t complicated, but having the right gear is half the battle. We recommend gathering:
Essential Tools
- Jack and jack stands
- Wheel chocks
- Socket set (typically 14mm caliper bolts)
- Brake caliper wind-back tool or EPB reset tool
- Flat-head screwdriver
- Torque wrench
- Brake cleaner spray
- High-temp brake grease
- New brake pads (ceramic recommended)
For Models With Electronic Parking Brake (EPB)
- OBD2 tool with EPB service mode
Or - Physical EPB button (for cars allowing manual maintenance mode)
Skipping the EPB procedure can cause brake damage—so we always make sure to do it right.
Mazda 3 Rear Brake Pad Specifications
Pad Material Options
- Ceramic – quieter, cleaner, long-lasting
- Semi-metallic – better bite, more dust
- Low-metallic – balanced performance, moderate noise
Most Mazda 3 owners prefer ceramic pads for their quietness and reduced dust buildup.
Typical Pad Thickness
- New pads: 10–12 mm
- Minimum safe thickness: 3 mm
Safety First: Precautions We Should Always Take
It’s easy to get carried away with confidence, but brakes deserve respect. We always:
- Park on flat ground
- Apply wheel chocks
- Never rely solely on a jack—use stands
- Keep fingers clear of caliper movement
- Avoid touching rotor friction surfaces with greasy hands
- Wear gloves and eye protection
Small mistakes lead to big problems; carefulness pays off.
Step-by-Step Guide: Mazda 3 Rear Brake Pad Replacement
Step 1: Prepare the Vehicle
Before diving into bolts and grease, we:
- Park the car.
- Engage “Park” or first gear.
- Chock opposite wheels.
- Loosen lug nuts slightly.
- Lift the Mazda 3 using a proper jacking point.
- Place jack stands under the frame.
Once the wheel is off, the brake assembly welcomes us like an open book.
You may be interested in reading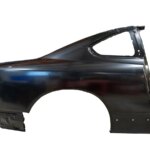 Mazda 3 Quarter Panel Replacement Cost: The Complete Repair Guide
Step 2: Disable the Electronic Parking Brake (EPB)
On EPB-equipped models:
Using the Brake Service Tool / OBD2
- Connect the tool
- Navigate to EPB Service Mode
- Retract the motors
Manual Combination (on some trims)
- Switch ignition ON
- Press accelerator + EPB switch simultaneously
- Car enters service mode
We confirm that the caliper piston moves freely before continuing.
Step 3: Remove the Caliper
The magic happens here:
- Locate the rear caliper bolts (usually 14mm).
- Remove the lower bolt first.
- Swing the caliper upward like a hinge.
- Slide out the old pads.
If pads are stuck, a gentle flat-head pry does the trick.
Step 4: Compress the Caliper Piston
Rear Mazda 3 pistons require winding—not pushing.
Using the Wind-Back Tool
- Attach the correct adapter
- Rotate clockwise
- Push simultaneously
This prepares space for the new thicker pads.
Key Reminder
Electronic calipers should never be forced without EPB retraction—doing so destroys the motor.
Step 5: Clean & Prepare the Brake Assembly
We prep the area like a surgeon:
- Spray brake cleaner on the rotor and caliper bracket
- Remove dust buildup
- Check for uneven wear
- Apply thin layers of brake grease on:
- Caliper slider pins
- Pad ears
- Contact surfaces
- Back of pads (noise prevention)
No grease should touch friction surfaces—ever.
Step 6: Install the New Rear Brake Pads
Slide the new pads into the bracket:
- Clip them into place
- Ensure the orientation matches old pad layout
- Confirm the wear indicator faces the correct direction
Misalignment here causes major noise later.
Step 7: Reassemble the Caliper
- Swing the caliper back into position.
- Reinstall caliper bolts.
- Torque to spec: typically 20–25 ft-lbs depending on model.
- Ensure no cables or sensors are twisted.
Everything should feel snug, clean, and aligned.
Step 8: Reactivate the EPB System
After the pads are installed, we return the system to normal mode:
- Using OBD2 tool: Exit Service Mode
- Using manual mode: follow reactivation sequence
Next, pump the brake pedal several times while the car is still off. This beds the piston against the pads.
Step 9: Reinstall the Wheel
- Tighten lug nuts by hand
- Lower the vehicle
- Torque to 80–90 ft-lbs
And just like that, the Mazda 3 begins to feel whole again.
Step 10: Bedding-In Procedure (Vital Yet Overlooked)
New pads need to bond with the rotors. We follow:
You may be interested in readingMazda 3 Quarter Panel Replacement Cost: The Complete Repair GuideYou may be interested in reading
 Volkswagen Taigo Dimensions: The Complete Size & Space Guide
Proper Bedding Steps
- Accelerate to 30 mph
- Brake firmly to 5 mph
- Repeat 5–8 times
- Allow cooling periods
- Avoid resting foot on brake pedal
This creates that smooth, glassy surface that optimizes braking.
Professional vs. DIY: What’s the Cost?
DIY Rear Brake Pad Replacement
- Pads: £25–£60 (ceramic)
- Cleaner/grease: £5–£10
- Total: £30–£70
Professional Garage
- Labour: £80–£150
- Parts: £50–£120
- Total: £130–£270
Dealers often run even higher—comfort charges extra.
Choosing the Best Replacement Brake Pads
We always consider:
Performance Level
- Daily driving: Ceramic
- Heavy city braking: Semi-metallic
- Spirited driving: Low-metallic
Longevity
Ceramic lasts the longest and keeps our wheels clean.
Noise Levels
Ceramic = whisper quiet
Semi-metallic = stronger bite but louder
Common Mistakes We Avoid
Even seasoned DIYers sometimes slip. Big red flags include:
- Forgetting EPB service mode
- Compressing pistons incorrectly
- Over-greasing components
- Reusing old shims
- Not torquing bolts properly
- Skipping brake bedding
A small mistake can echo for months as annoying brake noise.
Maintenance Tips to Make Pads Last Longer
With proper habits, we can squeeze thousands of extra miles from our pads:
- Coast more, brake less
- Avoid tailgating
- Regularly clean wheels/brakes
- Downshift when appropriate
- Check pad thickness at each service
Gentler driving equals lower costs.
Final Thoughts
Rear brake pad replacement is one of those Mazda 3 jobs that pays off immediately. The brake pedal feels firmer, the cabin becomes quieter, and the peace of mind alone is priceless. Whether we choose the DIY route or trust a professional garage, the key is ensuring the job is done right, with proper EPB handling, correct torque values, and a clean finish.
With the steps outlined above, we gain back control—not only over the brakes but over the confidence we feel behind the wheel.
FAQs
1. How long do Mazda 3 rear brake pads last?
Typically 25,000–50,000 miles, depending on driving style and pad type.
2. Do I need to replace rotors when changing pads?
Not always, but if rotors are heavily scored or warped, replacement is recommended.
3. Can I replace Mazda 3 pads without disabling the EPB?
No—EPB models must enter service mode first to avoid damage.
4. How much does a rear brake replacement cost?
DIY costs £30–£70, while professional service ranges £130–£270.
5. Which pads are best for everyday driving?
Ceramic pads offer the best combination of quietness, cleanliness, and longevity.
You may be interested in readingMazda 3 Quarter Panel Replacement Cost: The Complete Repair GuideYou may be interested in reading
Volkswagen Taigo Dimensions: The Complete Size & Space GuideYou may be interested in reading
 Volkswagen Tiguan Gearbox in Emergency Mode: The Full Troubleshooting & Survival Guide
If you want to know other articles similar to Mazda 3 Rear Brake Pad Replacement: The Complete DIY & Cost Guide you can visit the category Service and Parts.
Vauxhall Meriva Engine Management Light: Causes, Checks, and Fixes
Vauxhall Meriva Key Fob Replacement: Complete Guide
Vauxhall Meriva Tyre Size: Complete Fitment Guide
Vauxhall Meriva Engine Light: Causes, Diagnosis, and Fixes
Vauxhall Meriva Engine Oil: Complete Selection and Maintenance Guide
Vauxhall Meriva Code 82 Reset: Meaning, Steps, and Fixes
Leave a Reply
More content of your interest