

Battery Replacement Guide for Renault Clio (2009–2012)
When it’s time to replace a car battery, doing it safely and correctly is essential. In this guide, we show you how to properly replace the battery on a Renault Clio (2009–2012 models) to ensure everything works smoothly without unexpected issues.
You may be interested in reading Renault Clio Locking Wheel Nut Key Replacement: The Ultimate Guide
Content in this publication
Why Replace the Battery?
Signs the Battery Is Failing
Common symptoms of a failing battery include slow engine cranking, flickering electrical components, warning lights, or visible corrosion on the terminals.
You may be interested in readingRenault Clio Locking Wheel Nut Key Replacement: The Ultimate GuideYou may be interested in reading
 Renault Clio Oil Capacity — Complete Guide for Every Engine
Recommended Battery Specs for Clio 2009–2012
These Clio models typically use a 12V battery, with amp-hour (Ah) and cold cranking amps (CCA) varying by engine type. A common option is around 60Ah and 540A CCA. Always verify the exact battery specification for your engine version and region.
You may be interested in readingRenault Clio Locking Wheel Nut Key Replacement: The Ultimate GuideYou may be interested in reading
Renault Clio Oil Capacity — Complete Guide for Every EngineYou may be interested in reading
 How to Replace the Headlight Bulbs on a Renault Clio Mk3 💡
Preparation Before Replacement
Tools and Safety
- Ensure the engine is off and the key is removed from the ignition.
- You’ll need a socket or spanner set (for example, 8mm for the negative terminal and 13mm for the positive).
- Wear gloves and eye protection, especially if corrosion is present.
- Locate the bonnet release lever on the passenger side and open the bonnet securely.
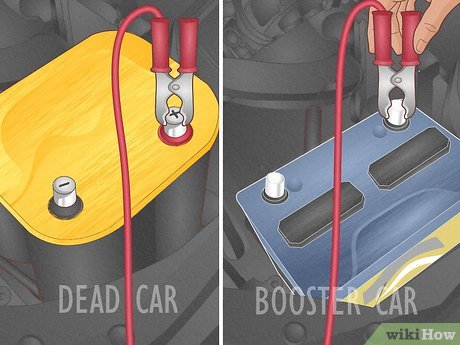
Disconnecting the Battery Correctly
- Open and secure the bonnet.
- Remove the battery cover(s).
- Always disconnect the negative terminal first to prevent shorts.
- Then disconnect the positive terminal.
Step-by-Step Battery Removal
Removing the Old Battery
- Loosen the nut on the negative terminal and remove the clamp.
- Loosen the nuts securing the positive connection plates and remove the positive clamp.
- Unscrew the battery hold-down clamp bolt.
- Disconnect the breather hose if equipped.
- Lift the battery out carefully — it’s heavy.
Installing the New Battery
- Place the new battery securely in the tray.
- Reconnect the breather hose if installed.
- Refit and tighten the hold-down clamp bolt.
- Attach the positive terminal and tighten its nuts.
- Attach the negative terminal and tighten securely.
- Apply petroleum jelly or dielectric grease to terminals to prevent corrosion.
- Reinstall battery covers and ensure they clip properly.
- Close the bonnet.
Final Checks
- Start the car and check electrical components: lights, radio, dashboard systems.
- Ensure no warning lights remain on.
- If your vehicle has Stop-Start or advanced electronics, reset systems according to the owner's manual.
- Dispose of the old battery at an approved recycling center.
Quick Summary
- Open bonnet and remove covers.
- Disconnect negative, then positive terminal.
- Remove battery clamp and lift battery out.
- Install new battery, connect positive, then negative.
- Grease terminals, refit covers, and test.
Common Mistakes to Avoid
- Connecting positive first when installing — increases risk of sparks/short circuits.
- Leaving battery loose — causes vibration damage.
- Skipping corrosion protection — leads to poor electrical contact.
- Choosing incorrect battery specs — can cause start or system malfunctions.
When Should You Replace the Battery?
Even without obvious symptoms, most batteries need replacing every 4–5 years. If voltage drops below 10V with engine off, replacement is usually necessary. Doing it early prevents breakdowns and starting issues.
Conclusion
Replacing the battery on your Renault Clio (2009–2012) is straightforward if you follow correct safety steps and install a compatible unit. Doing it yourself saves money and gives you confidence in basic car maintenance. Just remember the correct order for terminal removal and reconnection, use the right tools, and protect the terminals afterward.
 - Replace the battery")
If you want to know other articles similar to Battery Replacement Guide for Renault Clio (2009–2012) you can visit the category Service and Parts.
How to Reset Volvo XC60 Infotainment System: The Complete Practical Guide
Volvo XC60 Gearbox Oil Change: The Complete Expert Guide
Volvo XC60 Engine Management Light: Causes, Fixes, and What It Really Means

Skoda Kamiq Size Comparison: Dimensions, Space & Real-World Practicality
Volvo XC60 Headlight Adjustment for Europe: The Complete Practical Guide
Volvo XC60 City Safety Service Required: What It Means, Causes, and Fixes
Leave a Reply
More content of your interest