

How to Fix Fiat Panda Headlight Failures: Step-by-Step Guide
The Fiat Panda is a popular city car known for its reliability and affordability. However, like any vehicle, it can experience technical issues, including headlight failures. A faulty headlight can compromise safety on the road, especially at night or in low-visibility conditions. Fortunately, diagnosing and fixing headlight problems can be a relatively straightforward process. This guide will walk you through the steps to identify and repair common headlight issues on your Fiat Panda, helping you to get back on the road safely and efficiently, and potentially saving you money on costly repairs at a dealership or mechanic's workshop.
Content in this publication
Diagnosing and Troubleshooting Fiat Panda Headlight Failures
To address headlight failures in your Fiat Panda, it's crucial to start with a thorough diagnosis. Begin by checking the headlight bulbs for any signs of wear or damage. Often, a simple bulb replacement can resolve the issue. However, if the problem persists, it may indicate a more complex electrical or wiring issue. Ensure you consult your vehicle's manual or a professional mechanic for guidance on the correct replacement procedure and to rule out other potential causes.
Identifying the Root Cause of Headlight Failure
The first step in fixing your Fiat Panda's headlight failure is to identify the root cause. This involves checking the fuses and relays associated with the headlight circuit. A blown fuse or faulty relay can easily cause headlight failure. Consult your Fiat Panda's repair manual to locate these components and inspect them for any damage.
| Cause | Symptoms | Solution |
|---|---|---|
| Faulty Bulb | One or both headlights not working | Replace the bulb |
| Blown Fuse | Headlights stop working entirely | Replace the fuse |
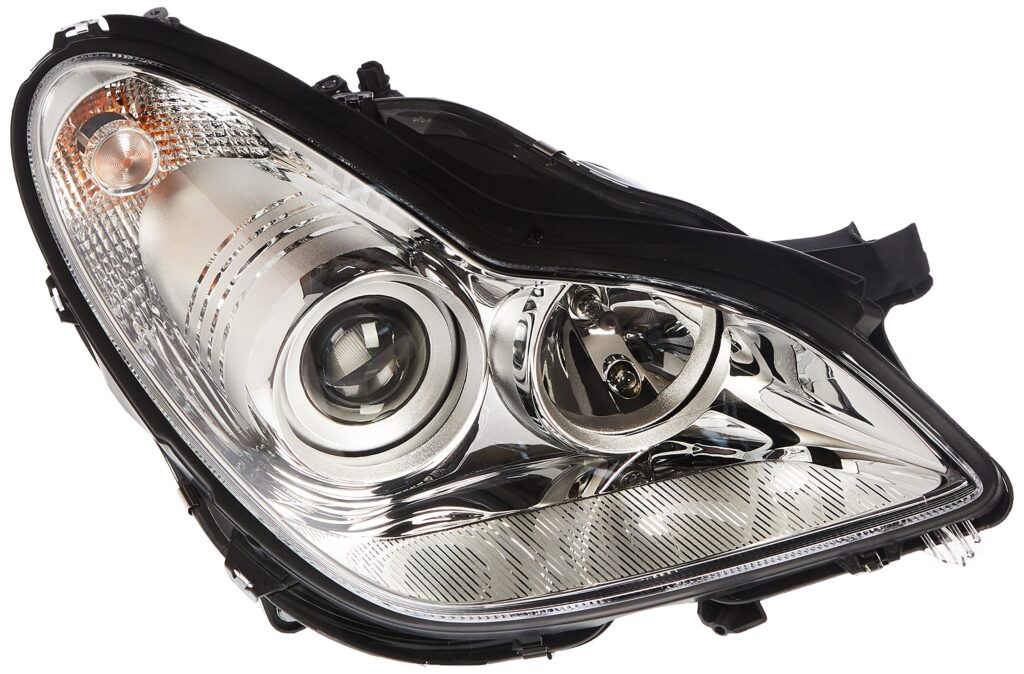
Replacing Headlight Bulbs and Assemblies
If the issue lies with the headlight bulb or assembly, you'll need to replace it. For the Fiat Panda, this process involves accessing the headlight assembly, disconnecting the electrical connector, and then removing the bulb or the entire assembly if necessary. Ensure you purchase a compatible replacement part to avoid any further issues.
| Part | Replacement Difficulty | Tools Required |
|---|---|---|
| Headlight Bulb | Moderate | Torx screwdriver, gloves |
| Headlight Assembly | Challenging | Torx screwdriver, socket wrench |
Advanced Troubleshooting for Persistent Issues
For persistent headlight issues that aren't resolved by replacing bulbs or fuses, advanced troubleshooting is necessary. This may involve checking the wiring harness for damage or corrosion, inspecting the headlight switch for faults, or using a multimeter to test for voltage drops across the circuit. These steps can help identify more complex electrical issues that require professional attention.
| Test | Purpose | Tools Needed |
|---|---|---|
| Voltage Drop Test | Identify excessive resistance in the circuit | Multimeter |
| Wiring Inspection | Detect damage or corrosion | Visual inspection, gloves |
How do you fix a headlight that is failing?

To fix a headlight that is failing, the first step is to identify the root cause of the problem. The most common issues include a burned-out bulb, a faulty electrical connection, or damage to the headlight assembly itself.
Checking the Headlight Bulb
The headlight bulb is the most likely component to fail. To check the bulb, you need to inspect it for any signs of damage or wear.
You can do this by:
 Troubleshooting Fiat Panda Electrical Issues: Common Causes and Solutions
- Turning off the engine and engaging the parking brake to ensure your safety while working on the headlight.
- Removing the headlight assembly or accessing the bulb through the provided access panel.
- Visually inspecting the bulb for any signs of damage, such as a broken filament or discoloration.
Inspecting the Electrical Connection
A faulty electrical connection can also cause a headlight to fail. To inspect the electrical connection, you need to check the wiring and connectors for any signs of damage or corrosion.
You can do this by:
- Checking the wiring for any signs of wear or damage, such as cuts or frays.
- Inspecting the connectors for any signs of corrosion or damage.
- Cleaning or replacing the connectors as needed to ensure a secure connection.
Repairing or Replacing the Headlight Assembly
If the headlight assembly is damaged, it may need to be repaired or replaced. To repair or replace the headlight assembly, you need to assess the extent of the damage and determine the best course of action.
You can do this by:
- Inspecting the headlight assembly for any signs of damage, such as cracks or dents.
- Determining whether the damage can be repaired or if the assembly needs to be replaced.
- Replacing the headlight assembly if necessary, or making the necessary repairs to restore it to working condition.
How to diagnose a headlight issue?
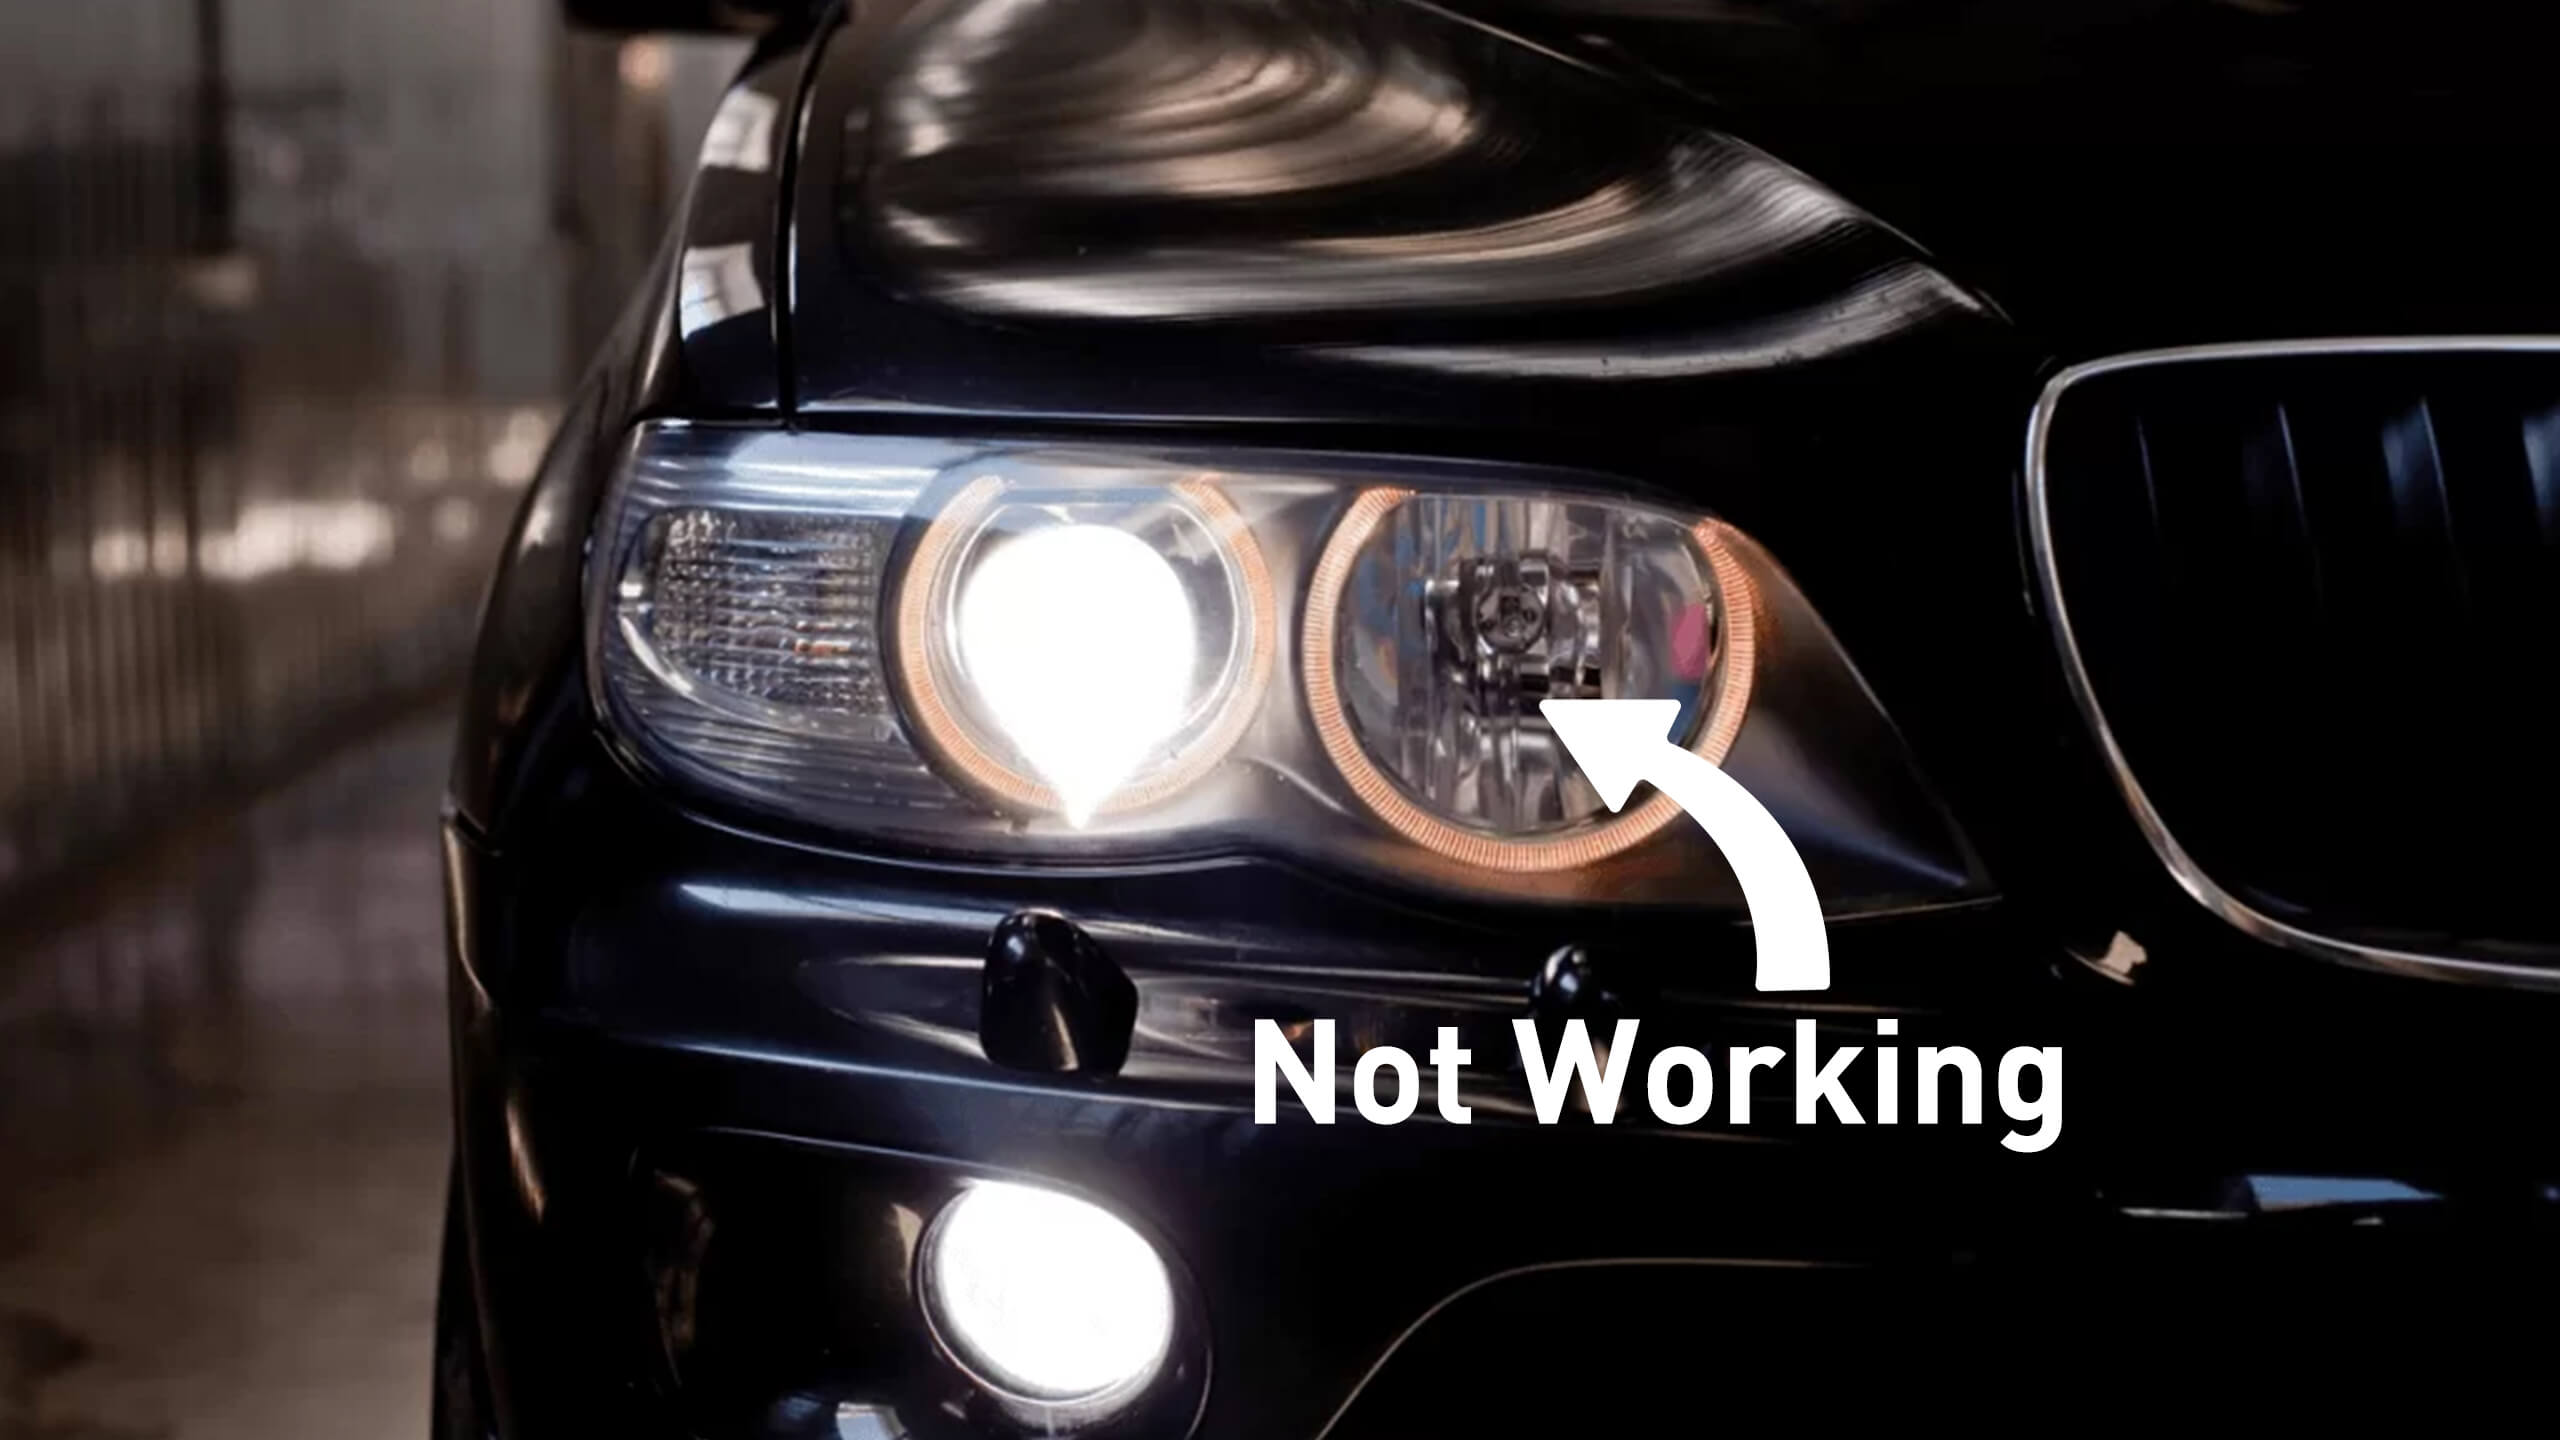
To diagnose a headlight issue, start by identifying the symptoms, such as dim or flickering lights, complete loss of light, or uneven light distribution. Check the headlight assembly for any visible signs of damage or wear, including cracks, dents, or rust. Next, inspect the bulb and socket for any signs of damage or corrosion. If the bulb is damaged, try replacing it with a new one to see if the issue is resolved.
Checking the Electrical System
The electrical system is a crucial component of the headlight system, and any issues with it can cause problems with the headlights. To check the electrical system, start by inspecting the fuse associated with the headlights. If the fuse is blown, replace it with a new one of the same rating.
- Check the wiring for any signs of damage, such as cuts, frays, or corrosion.
- Verify that the connections to the headlight assembly are secure and not loose.
- Use a multimeter to test the voltage at the headlight socket to ensure it is receiving the correct voltage.
Inspecting the Headlight Assembly
The headlight assembly is another critical component that can cause issues if damaged or worn out. Inspect the assembly for any signs of damage, such as cracks or dents, which can affect the light's distribution.
- Check the lens for any signs of damage or wear, such as cracks or discoloration.
- Verify that the headlight assembly is properly aligned and adjusted.
- Clean the headlight assembly to ensure it is free from dirt and debris.
Troubleshooting the Bulb and Socket
The bulb and socket are critical components of the headlight system, and issues with them can cause problems with the headlights. To troubleshoot the bulb and socket, start by inspecting the bulb for any signs of damage or wear.
- Check the bulb for any signs of damage, such as cracks or broken filaments.
- Verify that the bulb is properly seated in the socket.
- Clean the socket to ensure it is free from corrosion and debris.
How to troubleshoot headlight wiring?

Troubleshooting Fiat Panda Electrical Issues: Common Causes and SolutionsYou may be interested in reading
 Fiat Panda Oil Consumption Problems: What You Need to Know
To troubleshoot headlight wiring, start by understanding the basic components involved in the headlight circuit. The main elements include the headlight switch, relay, fuse, wiring, and the headlights themselves. Issues with any of these components can lead to malfunctioning headlights.
Identifying Common Issues
The first step in troubleshooting is to identify common issues that could be causing the problem. This involves checking for obvious signs of damage or wear.
- Inspect the wiring and connections for any signs of physical damage, corrosion, or wear.
- Check the fuse related to the headlight circuit; a blown fuse can be a straightforward reason for non-functioning headlights.
- Verify that the headlight switch is functioning correctly, as a faulty switch can prevent the headlights from turning on.
Testing Electrical Components
Once you've identified potential issues, the next step involves testing the electrical components. This requires a multimeter to check voltage and continuity.
- Use a multimeter to check for voltage at the headlight socket when the headlights are turned on; if there's no voltage, the issue lies elsewhere in the circuit.
- Test the continuity of the wiring and connections to ensure there are no breaks or shorts.
- Check the relay to ensure it's functioning correctly, as a faulty relay can prevent the headlights from receiving power.
Repairing or Replacing Faulty Components
After identifying the faulty component(s), the final step is to repair or replace them. This can involve fixing or replacing wiring, changing the fuse, or installing a new headlight switch or relay.
- Repair or replace any damaged wiring or connections to restore continuity.
- Replace a blown fuse with one of the correct amperage rating.
- Install a new headlight switch or relay if either is found to be faulty.
Frequently Asked Questions
What are the common causes of Fiat Panda headlight failures?
The most common causes of Fiat Panda headlight failures include burnt-out bulbs, faulty wiring, and damaged headlight assemblies. Additionally, issues with the headlight switch, fuse box, or relay can also lead to headlight malfunctions. In some cases, water ingress or corrosion can cause electrical issues, resulting in headlight failure. Identifying the root cause is crucial for effective repairs.
How do I replace the headlight bulb in my Fiat Panda?
To replace the headlight bulb, first, ensure the ignition is off and the headlights are cool. Then, access the bulb by removing the relevant cover or bezel. Disconnect the electrical connector, release the bulb retaining clip, and carefully remove the old bulb. Install the new bulb, ensuring it's securely seated, and reattach the retaining clip and electrical connector. Finally, test the headlight to verify it's working correctly.
Can I repair a damaged Fiat Panda headlight assembly myself?
Repairing a damaged headlight assembly can be challenging and may require specialized tools. If the damage is minor, such as a cracked lens, you can attempt to repair it using a suitable adhesive or replacement lens. However, if the damage is extensive or affects the electrical components, it's recommended to seek professional assistance to ensure a safe and effective repair.
How can I prevent future Fiat Panda headlight failures?
To prevent future headlight failures, regularly inspect the headlights for signs of damage or wear. Check the bulbs for dimming or discoloration, and replace them as needed. Ensure the headlight assemblies are clean and free of debris, and verify that the wiring and electrical connections are secure. Additionally, address any issues promptly to prevent minor problems from becoming major faults.
You may be interested in readingTroubleshooting Fiat Panda Electrical Issues: Common Causes and SolutionsYou may be interested in reading
Fiat Panda Oil Consumption Problems: What You Need to KnowYou may be interested in reading
 Resolving Fiat Panda Tailgate Release Mechanism Issues
If you want to know other articles similar to How to Fix Fiat Panda Headlight Failures: Step-by-Step Guide you can visit the category Common Problems.
Volvo XC60 360 Camera Not Working: Complete Troubleshooting & Fix Guide
Volvo XC60 Key Fob Not Working: Causes, Fixes, and Expert Solutions
Volvo XC60 Low Battery Warning: Causes, Fixes, and Prevention Guide
Volvo XC60 No Sound: Causes, Fixes, and Complete Troubleshooting Guide
Volvo XC60 Common Problems: What Owners Really Experience
Volvo XC60 Issues: The Truth Behind This Popular SUV
Leave a Reply
More content of your interest