Kia Picanto Clutch Cable Replacement: The Complete DIY Guide We All Wish Existed

- Introduction: Why Replacing a Clutch Cable Feels Scary (But Shouldn’t Be)
- What the Clutch Cable Actually Does (And Why It’s So Important)
- Signs Your Kia Picanto Clutch Cable Is Failing
- Why Clutch Cables Fail on the Kia Picanto
- How Long a Kia Picanto Clutch Cable Typically Lasts
- Tools & Parts You’ll Need Before Starting
- Before You Begin: Safety & Prep
- Step-By-Step: Kia Picanto Clutch Cable Replacement
- Removing the Old Clutch Cable
- Installing the New Clutch Cable
- Fine-Tuning: How to Adjust Kia Picanto Clutch Cable Properly
- Cost Breakdown: What You Can Expect to Pay
- OEM vs Aftermarket Clutch Cables: Our Honest Recommendation
- Common Mistakes People Make When Replacing the Cable
- How to Keep Your New Clutch Cable Healthy
- When a Clutch Cable Isn’t the Real Problem
- Final Thoughts: Replacing a Kia Picanto Clutch Cable Is Easier Than You Think
- FAQs
Introduction: Why Replacing a Clutch Cable Feels Scary (But Shouldn’t Be)
Ever felt that sinking feeling when your clutch pedal suddenly goes soft, stiff, or decides it doesn’t want to return anymore? We’ve all been there—sitting in a Kia Picanto, pressing the clutch, and thinking, “Please work, please work.” A failing clutch cable often chooses the worst moment to reveal itself, and when it does, we suddenly realise just how much we rely on this thin metal lifeline.
In this guide, we break down clutch cable replacement for the Kia Picanto in a clear, friendly, and oh-so-doable way. No jargon. No “you must be a mechanic” nonsense. Just real, practical knowledge from people who’ve done this more times than we can count.
We’ll walk you through symptoms, tools, costs, step-by-step instructions, diagrams, tips to make the job easier, and even the common mistakes that catch most DIYers off guard. Let’s get into it.
What the Clutch Cable Actually Does (And Why It’s So Important)
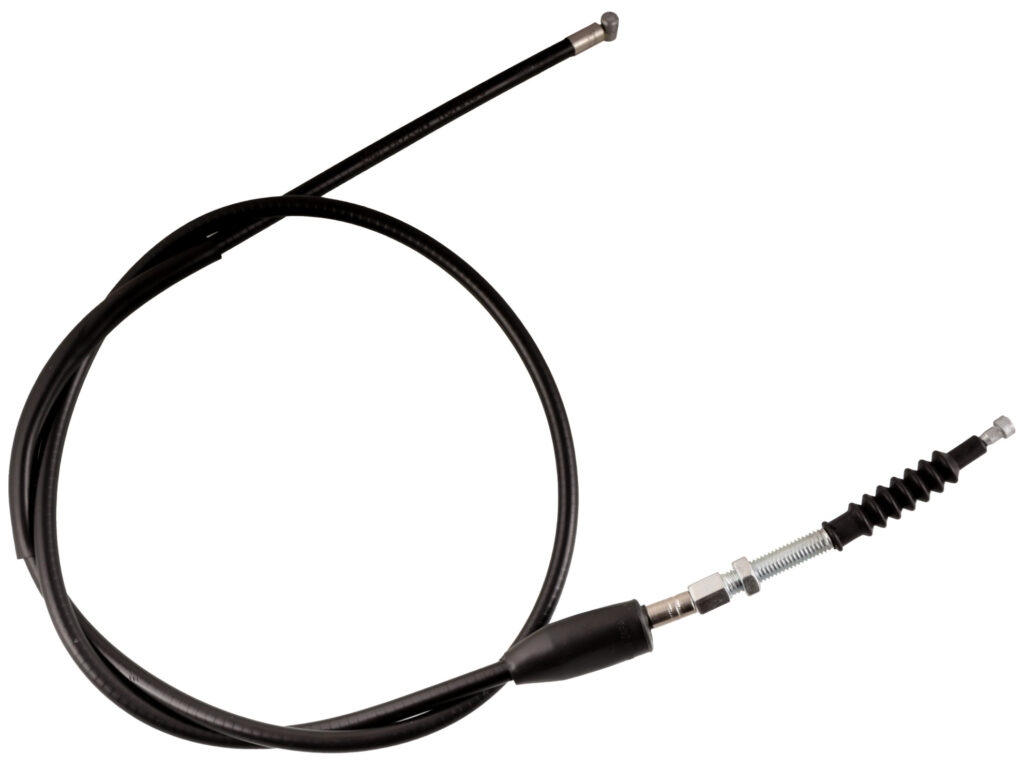
The clutch cable connects your clutch pedal to the clutch release mechanism inside the gearbox bell housing. In simple terms:
Press pedal → cable pulls → clutch disengages
Release pedal → cable relaxes → clutch engages
Without this humble cable, every gear change becomes an accidental grind-fest. It’s the sort of small component that quietly makes your drive smooth—until it doesn’t.
Signs Your Kia Picanto Clutch Cable Is Failing
Common Symptoms You Shouldn’t Ignore
A clutch cable rarely breaks without warning. Here’s what most owners notice first:
- Mushy or spongy clutch pedal
- Pedal sticking halfway down
- Pedal not returning fully
- Difficulty engaging gears
- Grinding when shifting
- Clicking or snapping sounds from pedal area
- Cable visibly frayed near the ends
- Need to adjust pedal height constantly
If you’re thinking, “Yep, that sounds like my car,” you’re exactly in the right place.
Why Clutch Cables Fail on the Kia Picanto
The Top Causes We See Repeatedly
- Age and metal fatigue
- Moisture entering the cable housing
- Aggressive stop-start urban driving
- Poor lubrication from factory or service neglect
- Cheap aftermarket cables with weak sheathing
- Pedal mechanism wear increasing friction
The Picanto—especially older models—tends to wear clutch cables more quickly than many cars due to tighter engine bay space and steeper bend angles.
How Long a Kia Picanto Clutch Cable Typically Lasts
| Model Year | Average Lifespan | Notes |
|---|---|---|
| 2004–2011 | 40,000–70,000 miles | Higher failure rate due to older design |
| 2012–2016 | 60,000–90,000 miles | Improved durability |
| 2017+ | 80,000–120,000 miles | Best cable quality to date |
If you’re on the lower end of these numbers, consider replacing it preventively.
Tools & Parts You’ll Need Before Starting
Essential Tools
- 10mm and 12mm spanners
- Long-nose pliers
- Flathead screwdriver
- Torx bits
- Small ratchet set
- Flashlight or work light
Parts
- New clutch cable (OEM or high-quality aftermarket)
- Grease or silicone lubricant
- Zip ties (optional but helpful)
- Replacement pedal clip (if yours breaks during removal)
Time & Difficulty
- Difficulty: 4/10 for beginners, 2/10 for regular DIYers
- Time required: 1 to 2 hours
Before You Begin: Safety & Prep
Preparation Steps
- Park on a flat surface
- Engage handbrake
- Disconnect battery (optional but recommended)
- Remove floor mat for pedal access
- Set up lighting near pedal assembly and engine bay
Little things like mats and tight space can drive you crazy mid-way if you don’t prep early.
Step-By-Step: Kia Picanto Clutch Cable Replacement
Below is the full process broken into simple, bite-sized tasks.
Removing the Old Clutch Cable
Step 1: Access the Pedal Assembly
Slide the driver’s seat back. Get your head near the pedals (hello, gym-like stretching), and locate the cable end attached to the top of the clutch pedal arm.
You may be interested in reading Kia Picanto Battery Replacement: The Complete Owner’s Guide
Step 2: Release the Cable from the Pedal
Use long-nose pliers to unhook the cable nipple. Sometimes you’ll need to press the pedal by hand to relax tension.
Step 3: Remove the Cable from the Firewall
Follow the cable through the bulkhead (firewall). There’s usually a grommet holding it snug—push and twist until it releases.
Step 4: Move to the Engine Bay
Open the bonnet. Locate the cable running between the firewall and gearbox bell housing.
Step 5: Disconnect from Gearbox Lever
At the gearbox end, loosen the adjustment nut and slide the cable off the release lever.
Step 6: Pull Cable Through
Slowly pull the entire cable toward the engine bay or cabin, depending on easiest access.
Installing the New Clutch Cable
Step 1: Feed New Cable Through Firewall
Guide the new cable gently through the same path as the old—Picanto routing is snug, so patience is your best friend.
Step 2: Attach to Gearbox
Hook the new cable end onto the release lever. Thread and tighten the adjustment nut until the cable is secure but not yet adjusted.
Step 3: Connect to Pedal
Inside the cabin, attach the cable end to the clutch pedal arm.
Step 4: Set Rough Adjustment
Turn the adjustment nut to remove slack but don’t overtighten. You want around 10–20mm pedal free play before tension begins.
Step 5: Test Pedal Movement
Press the pedal repeatedly—it should feel smoother than a fresh jar of peanut butter.
Fine-Tuning: How to Adjust Kia Picanto Clutch Cable Properly
Clutch cable adjustment is where most DIYers get stuck. Too tight = slipping clutch. Too loose = grinding gears.
Ideal Pedal Free Play
10–20mm measured at the top of pedal travel.
You may be interested in reading Kia Picanto Battery Replacement: The Complete Owner’s Guide
 Kia Picanto Handbrake Adjustment: The Complete Guide for Smooth, Safe Braking
How to Adjust
- Loosen or tighten the gearbox-end adjustment nut
- Test the pedal after each quarter-turn
- Ensure full gear engagement
- Check for smooth pedal return
Take your time—this is the difference between a smooth Picanto and a cranky one.
Cost Breakdown: What You Can Expect to Pay
DIY Cost
- Cable: £10–£35
- Tools: £0 if you already have them
- Total: £10–£35
Mechanic Cost
- Labour: £60–£120
- Cable: £15–£45
- Total: £75–£165
Doing it yourself saves you enough for a weekend road trip and a few coffees.
OEM vs Aftermarket Clutch Cables: Our Honest Recommendation
OEM Pros
- Longer lifespan
- Better heat and friction resistance
- Guaranteed fitment
OEM Cons
- More expensive
Aftermarket Pros
- Cheap
- Widely available
Aftermarket Cons
- Weaker housing
- Higher failure rate
- Shorter lifespan
Verdict: For the Picanto, we strongly recommend OEM or a top-tier aftermarket brand (Blueprint, Gates, Febi, or TRW).
Common Mistakes People Make When Replacing the Cable
- Routing the cable incorrectly
- Forgetting the firewall grommet
- Over-tightening adjustment nut
- Using low-grade cables that stretch quickly
- Not lubricating cable ends
- Leaving the pedal linkage dry or dirty
Avoid these and your work will last.
How to Keep Your New Clutch Cable Healthy
Maintenance Tips
- Lubricate the cable ends every 12 months
- Avoid resting your foot on the clutch pedal
- Ensure the pedal springs and bushings are clean
- Recheck adjustment every 6–12 months
- Replace cable immediately if fraying starts
When a Clutch Cable Isn’t the Real Problem
Sometimes you replace the cable… and the problem is still there. In that case, it may be:
- Worn clutch release bearing
- Damaged clutch fork
- Failing pressure plate
- Bent pedal assembly
- Seized gearbox release arm
If gears still misbehave after replacement and adjustment, look deeper.
Final Thoughts: Replacing a Kia Picanto Clutch Cable Is Easier Than You Think
We’ve all felt intimidated by car repairs at some point, but as we’ve shown, replacing a Kia Picanto clutch cable doesn’t need to be stressful. With a bit of patience and the right guidance, you can save money, learn something valuable, and keep your Picanto feeling new.
If you follow the steps above—slowly, carefully, and confidently—your clutch pedal will feel lighter, smoother, and far more responsive. And trust us, that first satisfying gear change after a fresh cable install? It feels incredibly rewarding.
FAQs
1. How long does a Kia Picanto clutch cable last?
Typically between 40,000 and 90,000 miles depending on model year and driving habits.
2. Do I need special tools to replace the cable?
No—standard spanners, pliers, and a ratchet set are enough.
3. How do I know if the cable needs adjusting?
If the pedal feels too tight, too loose, or gears grind while shifting, adjustment is necessary.
4. Should the clutch cable be lubricated?
Yes. A light silicone lubricant or lithium grease can improve lifespan.
You may be interested in reading Kia Picanto Battery Replacement: The Complete Owner’s Guide
 Kia Picanto Handbrake Adjustment: The Complete Guide for Smooth, Safe Braking
 Kia Picanto Key Battery Replacement: The Complete, Stress-Free Owner’s Guide
5. Is it worth paying a mechanic instead of DIY?
If you hate tight spaces or you’re short on time, paying a mechanic helps. Otherwise, DIY is totally feasible.
If you want to know other articles similar to Kia Picanto Clutch Cable Replacement: The Complete DIY Guide We All Wish Existed you can visit the category Service and Parts.
Leave a Reply


More content of your interest