

Toyota Corolla Headlight Assembly Replacement: A Complete DIY Guide
Content in this publication
- Introduction
- Why Replacing Your Headlight Assembly Matters
- Understanding Your Toyota Corolla Headlight Assembly
- Tools and Materials You’ll Need
- Preparing for the Replacement
- Step-by-Step Headlight Assembly Replacement
- Tips for a Smooth Installation
- Testing the New Headlight Assembly
- Common Mistakes to Avoid
- Estimated Cost of Replacement
- Maintaining Your Headlights for Longevity
- Conclusion
- FAQs
Introduction
Your car’s headlights aren’t just there to help you see at night—they’re your vehicle’s eyes on the road. If the headlight assembly on your Toyota Corolla is cracked, foggy, or completely busted, replacing it isn’t just about looks; it’s about safety. The best part? You can do it yourself without spending a fortune at the mechanic.
This guide walks you through everything you need to know about replacing a headlight assembly step by step. By the end, you’ll have clear, bright lights guiding your way again.
Why Replacing Your Headlight Assembly Matters
Safety First
Driving with a damaged headlight can drastically reduce visibility at night or in bad weather. A replacement ensures you can see clearly — and be seen by others.
Better Visibility and Style
New headlights can make your car look newer and sharper. A fresh assembly eliminates that dull yellow haze and restores clarity.
Avoiding Legal Trouble
In many areas, driving with broken or dim headlights can lead to fines. Replacing them on time keeps you compliant with traffic laws.
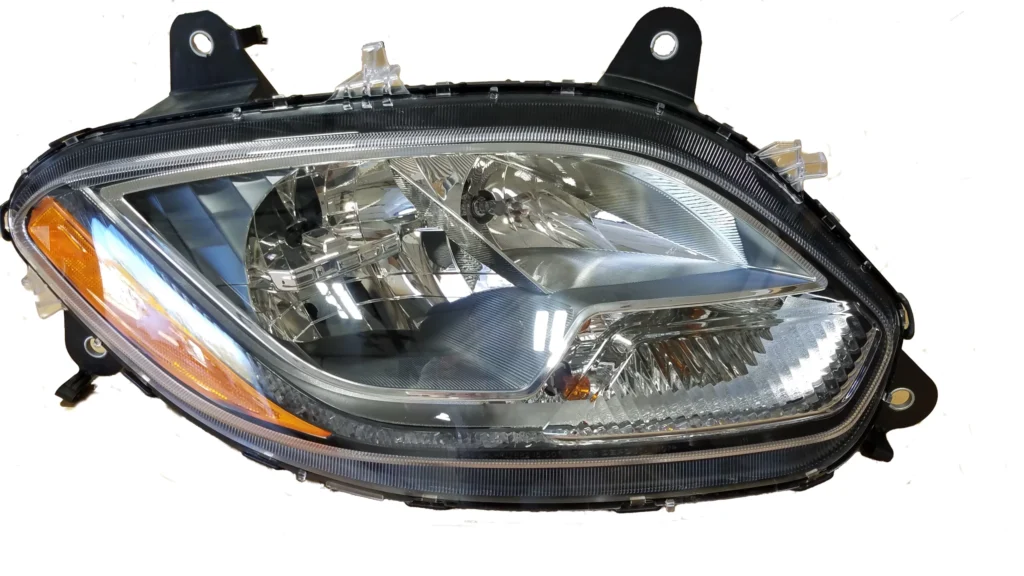
Understanding Your Toyota Corolla Headlight Assembly
Common Types of Headlight Assemblies
Depending on your model year, your Corolla may have reflector, projector, or LED-style headlights. Projector headlights offer focused beams, while reflector types are simpler and more common on older models.
How to Know When It’s Time to Replace
Here are a few red flags:
- Cracks or broken covers
- Foggy or oxidized lenses
- Flickering or dim lights
- Leaking moisture inside the assembly
If any of these sound familiar, it’s time to swap them out.
Tools and Materials You’ll Need
Basic Tools
- Socket wrench set
- Flathead and Phillips screwdrivers
- Trim removal tool
- Gloves
Optional Tools for Easier Installation
- Ratchet extension
- Headlamp alignment tool
- Plastic clips (in case old ones break)
Preparing for the Replacement
Parking and Safety Steps
Find a flat, well-lit area to work in. Set the parking brake and make sure the car is off. It’s smart to place wheel chocks behind your tires for extra safety.
Disconnecting the Battery
Before touching any wiring, disconnect the negative terminal of your battery. This prevents electrical shorts and accidental shocks.
You may be interested in reading How to Switch from Trip Meter to Odometer in a Toyota Camry
Step-by-Step Headlight Assembly Replacement
Step 1: Open the Hood
Pop the hood and secure it with the prop rod. This gives you clear access to the headlight housing.
Step 2: Remove the Front Bumper (If Needed)
On some Corolla models, the front bumper partially covers the headlight bolts. You may need to remove clips and screws to peel it back or take it off entirely.
Step 3: Unscrew the Old Headlight Assembly
Locate and remove the bolts securing the headlight assembly to the frame. Keep the screws organized — you’ll need them later.
Step 4: Disconnect Wiring Harness
Gently unplug the electrical connectors attached to the back of the headlight assembly. If clips are stubborn, a flathead screwdriver can help pry them open.
Step 5: Install the New Headlight Assembly
Slide the new headlight into place and align it with the mounting points. Reconnect the wiring harness securely.
Step 6: Reattach the Bumper and Reconnect the Battery
Once the headlight is snug, reinstall the bumper, tighten all bolts, and reconnect the negative battery terminal.
Tips for a Smooth Installation
Aligning the Headlights
Poorly aimed headlights can blind other drivers or limit your visibility. Adjust the vertical and horizontal aim screws to align the beam correctly.
Sealing and Moisture Prevention
Check the rubber seals around the headlight to prevent fogging. A light coat of dielectric grease on connectors can also help keep moisture out.
Testing the New Headlight Assembly
Checking High and Low Beams
Switch on your headlights and test both high and low beams. Make sure both sides match in brightness and angle.
Road Test at Night
A short nighttime drive helps ensure everything’s aligned and working properly. Notice any dark spots or uneven lighting? Adjust the aim again if needed.
You may be interested in readingHow to Switch from Trip Meter to Odometer in a Toyota CamryYou may be interested in reading
 2011 Toyota Camry Clutch Replacement: A Comprehensive Guide to Fixing Your Ride
Common Mistakes to Avoid
Forgetting to Disconnect the Battery
Skipping this step can lead to blown fuses or worse—electrical shocks. Always disconnect first.
Not Securing the Assembly Properly
A loose headlight can rattle or shift while driving. Tighten all bolts and clips to keep it stable.
Estimated Cost of Replacement
DIY vs. Professional Costs
A professional replacement can cost anywhere from $300 to $800, depending on the model year. Doing it yourself typically costs $100–$300 for parts.
Factors Affecting Price
- OEM vs. aftermarket parts
- Headlight technology (LED vs. halogen)
- Labor rates in your area
Maintaining Your Headlights for Longevity
Regular Cleaning
Wipe down headlights regularly to prevent oxidation. A microfiber cloth and mild soap work wonders.
Replacing Bulbs Early
Don’t wait for bulbs to burn out. Replacing them early ensures consistent brightness.
Protecting Against UV Damage
A UV-resistant film or clear coat can help keep lenses from yellowing over time.
Conclusion
Replacing your Toyota Corolla headlight assembly isn’t rocket science — it’s a straightforward job that can save you hundreds of dollars. With the right tools, a bit of patience, and this step-by-step guide, you can restore your headlights to their full glory. Bright, clear headlights don’t just make your car look better; they keep you safe on the road.
FAQs
1. How long does it take to replace a Toyota Corolla headlight assembly?
Usually about 1–2 hours, depending on your experience and whether the bumper needs to come off.
2. Do I need special tools for this job?
Nope! A basic socket wrench set and screwdrivers will get it done.
3. Should I replace both headlights at the same time?
It’s a good idea — this ensures even lighting and a consistent look.
You may be interested in readingHow to Switch from Trip Meter to Odometer in a Toyota CamryYou may be interested in reading
2011 Toyota Camry Clutch Replacement: A Comprehensive Guide to Fixing Your RideYou may be interested in reading
 2002 Toyota Camry Clutch Replacement: Everything You Need to Know
4. Can I use aftermarket headlight assemblies?
Yes, but make sure they meet local regulations and are compatible with your Corolla model year.
5. What if my new headlights fog up?
Check the seals and ensure everything is tight. If moisture persists, a desiccant pack inside the housing can help.
If you want to know other articles similar to Toyota Corolla Headlight Assembly Replacement: A Complete DIY Guide you can visit the category Service and Parts.
How to Reset Volvo XC60 Infotainment System: The Complete Practical Guide
Volvo XC60 Gearbox Oil Change: The Complete Expert Guide
Volvo XC60 Engine Management Light: Causes, Fixes, and What It Really Means

Skoda Kamiq Size Comparison: Dimensions, Space & Real-World Practicality
Volvo XC60 Headlight Adjustment for Europe: The Complete Practical Guide
Volvo XC60 City Safety Service Required: What It Means, Causes, and Fixes
Leave a Reply
More content of your interest