

How to Replace the Clutch in Your Car: A Complete Guide for the Hyundai i10 Grand Petrol

Content in this publication
Why and When Should You Replace the Clutch?
Common Signs of Clutch Wear
You’ll usually know your clutch needs replacement when you notice one or more of these symptoms:
- The clutch pedal feels softer or has an unusually long travel.
- The engine revs increase without a proportional gain in speed (“slipping clutch”).
- Gears are hard to engage, or you hear grinding noises when shifting.
These issues indicate wear in the clutch disc, pressure plate, or release bearing — all key components of the system.
The Importance of Proper Replacement
Replacing the clutch properly is crucial for your car’s performance and reliability. An incorrect installation can lead to transmission damage, premature wear on the flywheel, or poor gear engagement. A correctly fitted clutch ensures smooth power transfer, consistent pedal feel, and long-lasting performance.
You may be interested in reading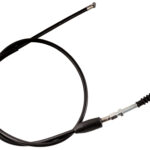 Hyundai i10 Clutch Cable Adjustment Guide: Step-by-Step Instructions and Expert Tips
Preparing for the Job
Tools and Parts You’ll Need
- A full socket and spanner set (metric sizes).
- Hydraulic jack and jack stands.
- Transmission support or lifting tool.
- New clutch kit (includes clutch disc, pressure plate, and release bearing).
- Grease for the input shaft splines and anti-seize compound for bolts.
- Safety gloves, goggles, and good lighting.
Safety First
Before you begin:
- Park the vehicle on a flat, stable surface.
- Disconnect the negative battery terminal to prevent electrical hazards.
- Lift the car securely using jack stands — never rely solely on the hydraulic jack.
Removing the Old Clutch
Step 1: Removing the Transmission
- Detach any parts obstructing access — exhaust components, underbody shields, and gear cables.
- Support the transmission with a jack or a transmission stand.
- Disconnect the shift linkage and transmission mounts.
- Unbolt the gearbox from the engine block and carefully separate it.
Step 2: Removing the Clutch Assembly
- Once the gearbox is removed, you’ll see the pressure plate and clutch disc.
- Loosen the pressure plate bolts gradually in a crisscross pattern to release tension evenly.
- Remove the clutch disc and release bearing.
- Inspect the flywheel for cracks, hot spots, or grooves. If damaged, replace or resurface it.
Installing the New Clutch
Step 3: Preparing and Aligning
- Clean the flywheel surface thoroughly.
- Position the new clutch disc using an alignment tool to ensure perfect centering — this is vital for smooth engagement and easy gearbox reinstallation.
- Apply a small amount of high-temperature grease to the input shaft splines.
Step 4: Mounting the Pressure Plate and Release Bearing
- Check the orientation of the pressure plate (“Flywheel side” vs. “Transmission side”).
- Tighten the pressure plate bolts evenly in a star pattern to the specified torque.
- Install the new release bearing, ensuring it moves freely on the guide sleeve.
Reinstalling the Transmission
Step 5: Reassembly
- Reinstall the gearbox carefully, aligning the input shaft with the clutch splines. Do not force it.
- Reattach the transmission mounts, linkages, exhaust system, and other removed components.
- If your Hyundai i10 Grand uses a hydraulic clutch, bleed the system to remove any air bubbles.
Step 6: Final Checks
- Before lowering the car, press the clutch pedal several times to ensure proper pressure.
- Start the engine and engage each gear to confirm smooth operation.
- Take a short, gentle test drive to verify that the clutch engages smoothly and no noises occur.
Tips for Extending Clutch Life
Smart Driving Habits
- Avoid keeping your foot on the clutch pedal in traffic — it causes premature wear.
- Don’t hold the car on a slope using the clutch; use the handbrake instead.
- Keep the hydraulic or cable system properly adjusted and leak-free.
Choosing Quality Parts
- Always invest in a reliable clutch kit from a reputable manufacturer.
- Replace the entire set — disc, plate, and bearing — at once for consistent performance.
- If resurfacing the flywheel, make sure it’s within the correct tolerance for flatness and thickness.
Frequently Asked Questions (FAQ)
Can I replace only the clutch disc?
Technically yes, but it’s not advisable. The pressure plate and bearing wear alongside the disc, and replacing only one component may cause imbalance and early failure.
How long does the job take?
For a professional mechanic, it usually takes 4 to 6 hours. DIY replacements might take longer, depending on experience and tools available.
You may be interested in readingHyundai i10 Clutch Cable Adjustment Guide: Step-by-Step Instructions and Expert TipsYou may be interested in reading
 How to Replace the Battery in a Hyundai i10: Complete Step-by-Step Guide
When should I resurface the flywheel?
If you find cracks, uneven surfaces, or burn marks, resurfacing or replacing the flywheel is strongly recommended to prevent vibration and uneven wear.
Conclusion
Replacing the clutch in a Hyundai i10 Grand petrol demands attention to detail, proper tools, and mechanical skill — but with patience and careful execution, it’s entirely achievable. By following each step of this structured guide, you’ll ensure a smooth installation, optimal performance, and extended clutch life.
A well-installed clutch not only restores your car’s driving comfort but also enhances its reliability for many miles to come.
You may be interested in readingHyundai i10 Clutch Cable Adjustment Guide: Step-by-Step Instructions and Expert TipsYou may be interested in reading
How to Replace the Battery in a Hyundai i10: Complete Step-by-Step GuideYou may be interested in reading
 Hyundai i10 Daytime Running Light Bulb Replacement – Complete Step-by-Step Guide
If you want to know other articles similar to How to Replace the Clutch in Your Car: A Complete Guide for the Hyundai i10 Grand Petrol you can visit the category Service and Parts.
Vauxhall Meriva Head Gasket Replacement Cost UK: Complete Price Guide
Vauxhall Meriva Tyre Pressure PSI: Complete Guide
Vauxhall Meriva Fault Codes: Meanings, Causes, and Fixes
Vauxhall Meriva Door With Key Symbol: Meaning, Causes, and Fixes
Vauxhall Meriva Code 59 and 60: Causes, Reset Steps, and Solutions
Vauxhall Meriva Immobiliser Reset: Complete Troubleshooting Guide
Leave a Reply
More content of your interest