The Ultimate Guide to a 1994 Toyota Camry Engine Swap: Is It Worth the Effort?

If you're a Toyota Camry enthusiast or just someone looking to upgrade or revamp your old 1994 Camry, you’ve probably considered an engine swap at some point. It sounds like a big deal, and, honestly, it is—but that’s what makes it exciting! In this article, we’ll explore the nuts and bolts of the engine swap process for a 1994 Toyota Camry. Whether you’re looking to boost performance, breathe new life into an aging engine, or take on a personal project, this guide will walk you through everything you need to know.
Let’s dive in!
- Why Consider an Engine Swap in the 1994 Toyota Camry?
- Understanding Your 1994 Toyota Camry’s Engine
- Steps to Prepare for the Engine Swap
- Engine Swap Process: Step-by-Step
- Common Challenges and How to Overcome Them
- The Benefits of a 1994 Toyota Camry Engine Swap
- Engine Swap Costs: What to Expect
- Tips for a Successful Engine Swap
- Final Thoughts: Is the Engine Swap Worth It?
Why Consider an Engine Swap in the 1994 Toyota Camry?
Engine swaps aren't just for the hardcore car enthusiasts or professional mechanics. They can also be the solution for anyone who wants a reliable, upgraded engine without purchasing a whole new car. The 1994 Toyota Camry has long been a reliable vehicle, but over the years, engines can wear out, or you may simply want to experience a boost in performance. Here's why you might consider swapping the engine in your 1994 Toyota Camry:
- Upgrading Performance: A more powerful engine means better speed and acceleration.
- Fuel Efficiency: Swapping to a more modern engine could enhance your car's fuel efficiency.
- Longevity: A new engine can extend the life of your vehicle by years.
- Customization: Swapping the engine lets you personalize your Camry to your preferences.
Understanding Your 1994 Toyota Camry’s Engine
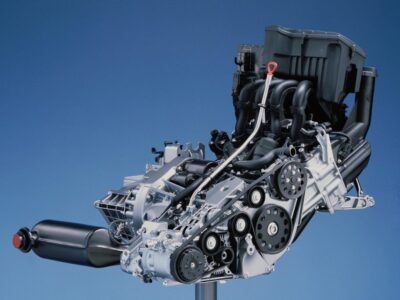
Before we even think about swapping out that engine, let’s break down the basics of the original setup. The 1994 Camry typically came with either a 2.2L 5S-FE 4-cylinder or a 3.0L 1MZ-FE V6 engine, depending on the trim. Understanding your current engine will help you choose a replacement that matches your expectations.
Engine Options for the 1994 Toyota Camry
- 4-Cylinder (2.2L 5S-FE): This engine is a solid choice for those who want decent performance and reliability without the extra weight of a V6.
- V6 (3.0L 1MZ-FE): If you’re looking for extra power and smoother performance, this V6 engine is a great option, though it comes with higher fuel consumption.
Steps to Prepare for the Engine Swap
Swapping an engine is no small feat. But don’t worry, we’ve got you covered. Let's walk through the process.
1. Decide on Your Goals: Performance vs. Economy
What’s your primary goal with the engine swap? Are you looking for more horsepower, or is reliability and fuel economy your top concern? Knowing this will influence the kind of engine you choose.
2. Choosing the Right Replacement Engine
The next step is deciding on the engine. You don’t have to stick with the original options. Many Toyota enthusiasts opt for more modern engines that offer better performance, improved fuel economy, or increased reliability.
You may be interested in reading How to Replace Camry Tail Light: A Step-by-Step Guide
- Swap to a Newer Toyota Engine: If you’re aiming for reliability, consider a newer Toyota engine (like the 2AZ-FE) that offers better fuel economy and performance.
- Consider an Aftermarket Engine: If performance is key, you might go for something like a turbocharged engine or even an engine from another Toyota model like the Supra.
- Performance V6 Engines: For a real performance upgrade, try swapping to a more powerful V6 like the 3.5L V6 (Toyota’s 2GR-FE), which will offer substantial horsepower gains.
3. Gather Your Tools and Parts
Before diving in, make sure you have the following items:
- A full engine replacement kit (including mounts, gaskets, wiring harness, etc.)
- Tools: A full mechanic’s toolbox, including wrenches, sockets, jacks, and lifting equipment
- Torque wrench to ensure bolts are fastened correctly
- New fluids: Engine oil, coolant, transmission fluid, etc.
- A good repair manual: This will help guide you through the swap, especially if you’re working with a different engine type.
Engine Swap Process: Step-by-Step
Step 1: Disconnect the Battery and Drain Fluids
Safety first! Disconnect the car’s battery and drain all fluids (engine oil, coolant, power steering fluid, etc.). This will prevent any accidents while working on the vehicle.
Step 2: Remove the Old Engine
This is the hard part—removing the old engine. You’ll need to detach the following:
- Transmission (unless you’re swapping that too)
- Exhaust components
- Wiring harness
- Fuel lines
Once everything is disconnected, you’ll need to lift the engine out using an engine hoist. It’s always good to have a buddy help, as the engine can be pretty heavy.
Step 3: Install the New Engine
Now that the old engine is out, it’s time to install the new one. Place the new engine carefully in the engine bay. Ensure that all mounts line up and that the engine is secure before tightening everything down.
Step 4: Reconnect All Components
This includes the transmission, wiring harness, exhaust components, and fuel lines. Be sure that all connections are tight and secure.
Step 5: Fill Fluids and Test the Engine
Once everything is in place, fill up the new engine with the appropriate fluids, such as oil and coolant. Start the car and listen for any strange sounds. If everything sounds good, you’re in the clear.
You may be interested in reading How to Replace Camry Tail Light: A Step-by-Step Guide
 The Ultimate Guide to Replacing Toyota Camry Bushings: What You Need to Know
Common Challenges and How to Overcome Them
Swapping engines isn’t without its challenges. Here are a few roadblocks you might encounter:
- Wiring Issues: The wiring harness from the old engine might not match the new one. This could require custom modifications to make everything fit.
- Mounting Issues: Engine mounts might not line up perfectly, depending on the engine you’re swapping in. You may need new mounts or adaptors.
- Transmission Compatibility: The transmission from your original engine might not be compatible with your new engine. In this case, you’ll need to swap out the transmission as well.
Troubleshooting Tips:
- Double-check all connections before starting the engine.
- Don’t rush the process—take your time with each step.
- If you’re not sure about something, consult a professional or a repair manual.
The Benefits of a 1994 Toyota Camry Engine Swap
- Better Performance: With the right engine swap, you’ll notice a significant improvement in power and responsiveness.
- Extended Vehicle Life: Replacing an aging engine can give your Camry many more years of driving.
- Enhanced Driving Experience: Upgrading to a smoother, more powerful engine can transform your daily commute into a more enjoyable ride.
Engine Swap Costs: What to Expect
The cost of an engine swap can vary depending on several factors:
- Engine Price: A used engine can cost anywhere between $500 and $3,000, depending on the model and condition.
- Labor Costs: If you’re hiring a mechanic, labor costs can range from $500 to $2,000, depending on the complexity of the job.
- Additional Parts: Don’t forget about the additional parts you’ll need, including engine mounts, gaskets, and fluids.
Tips for a Successful Engine Swap
- Plan Ahead: Don’t rush the project. Make sure you have all the parts and tools you need.
- Research Your Engine Options: Not all engines are created equal, so choose one that meets your goals.
- Get Help if Needed: If you’re new to engine swaps, consider enlisting the help of a professional or experienced mechanic.
Final Thoughts: Is the Engine Swap Worth It?
In the end, swapping the engine in your 1994 Toyota Camry can be an incredibly rewarding project. If you're looking for a reliable car that you can continue driving for years to come, this is a great way to extend the lifespan of your Camry. It’s a great way to breathe new life into an old car, boost performance, and customize your ride. Just make sure to do your research, gather the right tools, and take it slow.
FAQs
1. How long does a 1994 Toyota Camry engine swap take?
It can take anywhere from 8 to 15 hours, depending on the complexity of the swap and your experience level.
2. Can I swap a V6 into my 1994 Camry?
Yes, but you might need to modify the engine mounts and wiring harness to accommodate the V6 engine.
3. Is an engine swap worth the cost?
If you're looking for a long-term solution and want to upgrade performance, an engine swap is a good investment.
4. Can I swap engines myself?
If you have the right tools and experience, you can swap the engine yourself, but it's often better to have a professional assist.
 How to Replace Camry Tail Light: A Step-by-Step Guide
 The Ultimate Guide to Replacing Toyota Camry Bushings: What You Need to Know
 How to Replace Toyota Camry Tire Pressure Sensor: A Complete Guide
5. How can I make sure the new engine is compatible with my Camry?
Research the engine's specifications and consult with a mechanic or refer to a repair manual to ensure compatibility.
If you want to know other articles similar to The Ultimate Guide to a 1994 Toyota Camry Engine Swap: Is It Worth the Effort? you can visit the category Service and Parts.
Leave a Reply


More content of your interest