

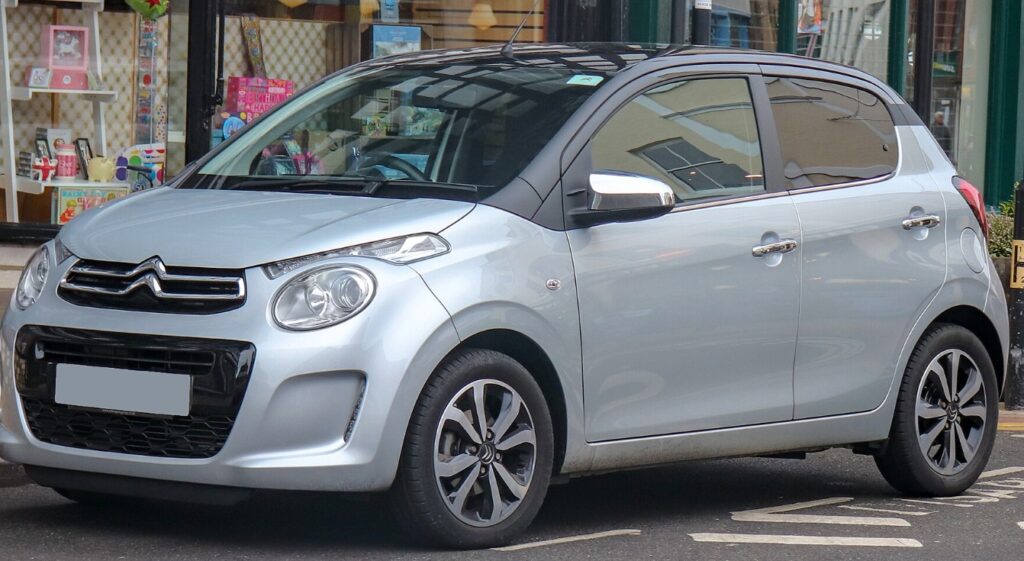
Citroen C1 Indicator Stalk Replacement: A Complete DIY-Friendly Guide
The Citroen C1 is one of those little city cars that quietly gets on with life. It is compact, cheerful, cheap to run, and surprisingly tough. But like any car that spends its days dodging potholes, roundabouts, tight parking spaces, school runs, and stop-start traffic, small electrical parts can eventually begin to complain. One of those parts is the indicator stalk.
A faulty indicator stalk can feel like a tiny problem at first. Maybe the turn signal only works when we hold the lever at a certain angle. Maybe the headlights flicker. Maybe the main beam refuses to stay on. Or perhaps the indicators simply stop responding, leaving us doing the awkward “sorry, I promise I was turning” wave at other drivers.
That is where Citroen C1 indicator stalk replacement becomes worth understanding. The indicator stalk, sometimes called the column switch, combination switch, or steering column switch, controls more than we may think. Depending on the model year and trim, it can operate the indicators, headlight functions, high beam, flash-to-pass, and sometimes fog light controls.
The good news? Replacing the indicator stalk on a Citroen C1 is often a manageable job for a confident DIYer. We do not need to be a master mechanic with a garage full of shiny tools. But we do need patience, care, and respect for the electrical components around the steering column, especially because some cars have airbag-related wiring nearby.
Let’s walk through the job properly, like we are standing beside the car with a cup of coffee, a screwdriver, and just enough caution to avoid turning a small fix into a big headache.
Content in this publication
- Why the Citroen C1 Indicator Stalk Matters More Than We Think
- Common Signs You Need a Citroen C1 Indicator Stalk Replacement
- Before Replacing the Indicator Stalk, Check These First
- Understanding the Citroen C1 Indicator Stalk Assembly
- Tools Needed for Citroen C1 Indicator Stalk Replacement
- Safety First: Disconnecting the Battery
- Step-by-Step Citroen C1 Indicator Stalk Replacement
- Step 1: Park Safely and Prepare the Car
- Step 2: Disconnect the Battery
- Step 3: Remove the Steering Column Covers
- Step 4: Locate the Indicator Stalk Fixings
- Step 5: Photograph the Wiring Connectors
- Step 6: Disconnect the Electrical Connector
- Step 7: Remove the Old Indicator Stalk
- Step 8: Install the New Indicator Stalk
- Step 9: Reconnect the Wiring
- Step 10: Refit the Steering Column Covers
- Step 11: Reconnect the Battery
- Step 12: Test Every Function
- How Long Does Citroen C1 Indicator Stalk Replacement Take?
- Choosing the Right Replacement Indicator Stalk
- Citroen C1 Indicator Stalk Replacement Cost
- Can We Repair the Existing Indicator Stalk Instead?
- Common Mistakes to Avoid During Replacement
- Troubleshooting After Replacing the Indicator Stalk
- Citroen C1, Peugeot 107, and Toyota Aygo: Are the Stalks the Same?
- When Should a Professional Replace the Indicator Stalk?
- How to Keep the New Indicator Stalk Working Longer
- Is Citroen C1 Indicator Stalk Replacement Worth Doing Yourself?
- Quick Citroen C1 Indicator Stalk Replacement Checklist
- Final Thoughts on Citroen C1 Indicator Stalk Replacement
- FAQs About Citroen C1 Indicator Stalk Replacement
- 1. How do I know if my Citroen C1 indicator stalk is faulty?
- 2. Can I replace a Citroen C1 indicator stalk myself?
- 3. Do I need to disconnect the battery before replacing the indicator stalk?
- 4. Are Citroen C1, Peugeot 107, and Toyota Aygo indicator stalks interchangeable?
- 5. Why do my hazard lights work but my indicators do not?
Why the Citroen C1 Indicator Stalk Matters More Than We Think
The indicator stalk is one of the most-used controls in the car. Every lane change, every junction, every roundabout, every flash of the headlights puts it to work. It lives right behind the steering wheel, but it has a direct role in road safety.
When it works, we barely notice it. When it fails, we notice immediately.
A healthy indicator stalk helps us:
- Signal turns clearly
- Communicate lane changes
- Control dipped and main beam headlights
- Flash headlights when needed
- Use fog lights if integrated into the stalk
- Maintain predictable driving behavior
Think of it as the car’s body language. Without it, the Citroen C1 becomes like someone walking through a crowd without pointing, nodding, or saying where they are going. Confusing, right?
Common Signs You Need a Citroen C1 Indicator Stalk Replacement
A failing stalk does not always stop working overnight. Often, it gives little warnings first. We just need to know what those warnings look like.
Indicators Not Working on One Side
One of the most common symptoms is when the left or right indicator stops working from the stalk. The bulbs may be fine, the hazard lights may still work, but the turn signal refuses to respond when we move the lever.
This can suggest an internal contact fault inside the stalk.
Indicator Only Works When Held in Position
If the indicator works only when we hold the stalk slightly up, down, pushed, or pulled, the internal switch contacts may be worn. This is like a light switch in a house that only works when we press it at the perfect angle. It may keep working for a while, but it is already telling us something is wrong.
Fast Clicking or No Clicking at All
Fast indicator clicking usually points to a bulb fault, but not always. If bulbs are good and hazard lights behave normally, the stalk may be worth checking.
No clicking at all can mean the signal is not being triggered.
Headlights Flickering or Cutting Out
On many Citroen C1 models, the indicator stalk is part of a combined lighting switch. If the headlights flicker when the stalk is touched, rotated, or moved, the stalk assembly may be worn.
Main Beam Not Staying On
A faulty stalk may stop the high beam from locking into position. We may still be able to flash the lights, but the main beam may not stay engaged.
Stalk Feels Loose, Crunchy, or Unnatural
A good stalk should feel smooth and positive. If it feels floppy, sticky, overly stiff, or like something is grinding inside, the mechanical part of the switch may be worn or broken.
Fog Light Control Problems
If the fog light switch is built into the same stalk, fog light problems can also point toward the stalk assembly, especially if the bulbs, fuses, and wiring check out.
Before Replacing the Indicator Stalk, Check These First
We should not rush straight into replacing parts. A stalk may be faulty, but simple issues can mimic stalk failure. Before buying a replacement, check the basics.
Check the Indicator Bulbs
A blown bulb can make the indicators flash quickly or fail on one side. Walk around the car with the indicators and hazards on. Look for bulbs that are dim, dead, or flashing oddly.
Check the Fuses
A blown fuse can stop lighting circuits from working. The fuse box location and fuse numbers may vary by year, so check the owner’s manual or fuse box diagram.
Check the Hazard Lights
This is a useful clue. If the hazard lights work perfectly but the indicators do not respond from the stalk, the fault is more likely to be in the stalk, steering column switch, or related wiring.
Check for Water or Corrosion
Small cars can suffer from moisture issues, especially around older wiring connectors. Corrosion can create strange electrical behavior. Look for greenish deposits, dampness, or loose connectors.
Check the Relay or Flasher Function
Depending on the model year and system design, the clicking function may be controlled electronically rather than by a simple old-style relay. Still, it is worth considering if the stalk seems fine but the indicators behave strangely.
Understanding the Citroen C1 Indicator Stalk Assembly
The Citroen C1 shares much of its platform with the Peugeot 107 and Toyota Aygo from the same era. That means some parts look very similar, and in certain cases, compatible components may exist across these models. However, we should never assume compatibility based only on appearance.
What the Stalk Usually Controls
Depending on the exact year and trim, the stalk may control:
- Left and right indicators
- Side lights
- Dipped beam headlights
- Main beam headlights
- Headlight flash
- Front fog lights
- Rear fog lights
Some versions may have separate controls or slightly different stalk designs. This is why part matching matters.
Is It One Stalk or a Full Column Switch Unit?
On some cars, the indicator stalk can be replaced as a single side switch. On others, it may be part of a larger steering column switch assembly. This matters because the part price, replacement difficulty, and fitting process can change.
If we are buying a part online, we should compare:
- Vehicle year
- Number of doors
- Trim level
- Fog light controls
- Headlight control layout
- Part number
- Connector shape
- Airbag/clock spring arrangement nearby
Tools Needed for Citroen C1 Indicator Stalk Replacement
We do not usually need a huge toolkit, but having the right tools makes the job cleaner and safer.
Basic Tool List
Common tools may include:
- Phillips screwdriver
- Flat trim tool or plastic pry tool
- Torx screwdrivers or bits
- Small socket set
- Flashlight
- Electrical contact cleaner
- Gloves
- Magnetic tray for screws
- Replacement indicator stalk or column switch
Optional Helpful Items
These are not always necessary, but they can help:
- Phone camera for reference photos
- Masking tape for labeling connectors
- Multimeter for testing continuity
- Workshop manual or wiring diagram
- Battery terminal spanner
The phone camera is underrated. Taking photos before removing connectors is like leaving breadcrumbs in a forest. When it is time to put everything back, those photos can save us from second-guessing.
Safety First: Disconnecting the Battery
Before working around the steering column, we should disconnect the battery. This is especially important because steering column areas may have wiring related to the horn, airbag, and clock spring.
How to Approach Battery Disconnection
A sensible process is:
- Turn off the ignition.
- Remove the key.
- Open the bonnet.
- Disconnect the negative battery terminal.
- Wait at least 10–15 minutes before working near steering column wiring.
That waiting time allows electrical systems to power down. It is not glamorous, but it is smart.
You may be interested in reading Citroen C1 Key Fob Replacement: A Complete Friendly Guide
Do We Need to Remove the Steering Wheel?
For many indicator stalk replacements, the steering wheel may not need to come off. Often, the upper and lower steering column shrouds can be removed, giving access to the stalk screws and connectors.
However, on some versions or full column switch replacements, extra disassembly may be needed. If the job requires airbag or steering wheel removal and we are not comfortable with that, it is better to use a professional.
Step-by-Step Citroen C1 Indicator Stalk Replacement
Now let’s get into the actual process. This is a general guide, and the exact details can vary depending on model year. Still, the broad approach is similar on many Citroen C1 models.
Step 1: Park Safely and Prepare the Car
Park on level ground with the wheels straight. Make sure the car is secure, the ignition is off, and the key is removed.
We should also adjust the steering wheel position if possible to give better access around the column.
Step 2: Disconnect the Battery
Disconnect the negative battery terminal and wait. Do not skip this step. Electrical jobs reward patience and punish rushing.
Step 3: Remove the Steering Column Covers
The steering column covers are usually plastic shrouds around the column behind the steering wheel. They may be held by screws underneath and plastic clips.
Carefully remove the screws, then separate the upper and lower covers. Use a plastic trim tool if needed. Avoid forcing the plastic because older trim can become brittle.
Step 4: Locate the Indicator Stalk Fixings
Once the covers are off, we should see the indicator stalk assembly attached to the steering column area.
Look for small screws, clips, or locking tabs holding it in place. Some stalks slide into the column switch housing; others are fastened more securely.
Step 5: Photograph the Wiring Connectors
Before unplugging anything, take a clear photo. This small habit can save a lot of frustration. Make sure the connector colors, positions, and routing are visible.
Step 6: Disconnect the Electrical Connector
Press the connector tab and unplug the wiring carefully. Do not pull by the wires. Pull by the connector body.
If the connector is stubborn, use gentle pressure and inspect for a locking clip. Forcing it can break the connector, and then we have created a second repair.
Step 7: Remove the Old Indicator Stalk
Undo the screws or release the clips holding the stalk. Slide or lift it out depending on the design.
At this point, compare the old part with the replacement. The shape, connector, control markings, and mounting points should match.
Step 8: Install the New Indicator Stalk
Fit the new stalk into place. It should sit cleanly without force. If it does not line up, stop and compare parts again.
Tighten screws gently. Plastic housings do not like being over-tightened.
Step 9: Reconnect the Wiring
Plug the connector back in until it clicks or seats firmly. Check that the wiring is not trapped or rubbing against moving parts.
Step 10: Refit the Steering Column Covers
Reinstall the upper and lower shrouds. Make sure clips align before tightening screws. Again, gentle pressure is our friend.
Step 11: Reconnect the Battery
Reconnect the negative battery terminal securely.
Step 12: Test Every Function
Before driving, test:
- Left indicator
- Right indicator
- Hazard lights
- Side lights
- Dipped beam
- Main beam
- Headlight flash
- Fog lights if fitted
- Horn if affected by nearby work
- Steering movement lock-to-lock
Everything should work smoothly without flickering, sticking, or cutting out.
How Long Does Citroen C1 Indicator Stalk Replacement Take?
For a confident DIYer, the job may take around 30 to 90 minutes, depending on experience and the exact version of the car.
A garage may complete it faster, especially if they have done similar Peugeot 107, Toyota Aygo, or Citroen C1 column switch jobs before.
What Can Make the Job Take Longer?
The job can take longer if:
- Screws are hidden or awkward
- Plastic clips are brittle
- The wrong replacement part was purchased
- Connectors are tight
- The steering wheel needs removal
- Previous repairs have damaged wiring
The biggest time thief is usually uncertainty. That is why checking the part number and taking photos helps.
Choosing the Right Replacement Indicator Stalk
Buying the right part is half the battle. The Citroen C1 is simple in spirit, but parts can still vary.
New vs Used Indicator Stalk
A new part gives peace of mind, but it may cost more. A used part can be cheaper, especially from a breaker or salvage supplier, but it may already have wear.
Aftermarket vs Genuine Part
Aftermarket parts can be good value, but quality varies. Genuine parts are usually safer in terms of fit and feel, though they may be more expensive.
What to Check Before Buying
Before ordering, check:
- Citroen C1 year
- Engine type if requested by supplier
- Trim level
- Fog light controls
- Headlight switch style
- Connector pins
- Part number
- Return policy
The return policy matters. A stalk can look correct in photos and still be wrong by one connector or one function.
Citroen C1 Indicator Stalk Replacement Cost
The cost can vary depending on whether we choose a used, aftermarket, or genuine part, and whether we fit it ourselves or use a garage.
DIY Cost
If we do the work ourselves, the main cost is the replacement stalk. Used parts are often the cheapest route, while new genuine parts cost more.
Garage Cost
At a garage, we pay for both the part and labor. Since the job is usually not extremely labor-heavy, labor may be reasonable unless the steering wheel or airbag needs to be removed.
Why Prices Vary
Prices can change based on:
- Model year
- Part availability
- Whether the stalk includes lighting and fog controls
- Whether a full column switch assembly is needed
- Local labor rates
- Genuine vs aftermarket parts
A simple stalk replacement is usually far cheaper than major electrical diagnosis, but guessing wrong can become expensive. Diagnose first, replace second.
Can We Repair the Existing Indicator Stalk Instead?
Sometimes, yes. But it depends on the fault.
You may be interested in readingCitroen C1 Key Fob Replacement: A Complete Friendly GuideYou may be interested in reading
Citroën C1 Engine Light: What It Means, Causes, and How to Fix ItWhen Cleaning May Help
If the stalk works intermittently because of dirty contacts, electrical contact cleaner may help. However, spraying cleaner into the wrong area or soaking plastic parts is not ideal. We need to be careful.
When Replacement Is Better
Replacement is usually better if:
- The stalk is physically loose
- The internal mechanism is broken
- The switch does not click properly
- The lights flicker when touched
- The fault keeps returning after cleaning
- The contacts are badly worn
A worn switch is like an old door latch. We can wiggle it for a while, but eventually it needs replacing.
Common Mistakes to Avoid During Replacement
Replacing the indicator stalk is not the hardest job in the world, but small mistakes can cause big annoyance.
Mistake 1: Not Disconnecting the Battery
Electrical safety matters. Always disconnect the battery before working near the steering column.
Mistake 2: Buying the Wrong Part
This is very common. Matching only “Citroen C1 indicator stalk” is not enough. We need the correct layout, connector, and functions.
Mistake 3: Forcing Plastic Covers
The column shrouds can crack if forced. Look carefully for hidden screws before prying.
Mistake 4: Pulling Wires Instead of Connectors
Wires are not handles. Pulling on them can create loose connections or broken terminals.
Mistake 5: Forgetting to Test All Functions
Do not test only the indicators. Test lights, beams, fog lights, and steering movement too.
Troubleshooting After Replacing the Indicator Stalk
What if we replace the stalk and the problem remains? Annoying, yes. But not the end of the road.
Indicators Still Not Working
Check the bulbs, fuses, hazard switch, wiring, and connectors. If hazards work but indicators do not, inspect the stalk connector and related circuit again.
Lights Flicker After Replacement
The connector may not be seated fully, the replacement part may be faulty, or there may be a wiring issue in the column area.
One Function Works but Another Does Not
This often suggests the wrong part variant was installed. For example, a stalk without fog light compatibility may not operate the fog lamps correctly.
Airbag Warning Light Appears
If an airbag light appears after working near the steering column, stop guessing. This may require diagnostic scanning. Do not poke around airbag wiring casually.
Citroen C1, Peugeot 107, and Toyota Aygo: Are the Stalks the Same?
The first-generation Citroen C1, Peugeot 107, and Toyota Aygo were closely related city cars. Many mechanical and electrical parts are similar, and some may interchange.
But “similar” is not the same as “guaranteed.”
Why Compatibility Can Be Tricky
Differences may exist in:
- Lighting controls
- Fog light setup
- Connector pin layout
- Trim options
- Production year
- Market specification
So yes, cross-compatible parts may exist, but we should verify using part numbers and physical comparison.
When Should a Professional Replace the Indicator Stalk?
DIY is satisfying, but there are times when handing the keys to a mechanic is the smarter move.
Use a Professional If:
- The steering wheel must be removed
- Airbag components are involved
- You are unsure about electrical safety
- The fault is intermittent and hard to diagnose
- The new part does not solve the issue
- You do not have the correct tools
- You need diagnostic scanning
There is no shame in getting help. A good DIYer knows when to pause.
How to Keep the New Indicator Stalk Working Longer
We cannot make any switch last forever, but we can avoid unnecessary wear.
Use Smooth Movements
Do not snap the stalk aggressively. A light, firm movement is enough.
Avoid Hanging Accessories Near the Column
Dangling items can interfere with steering column controls.
Fix Moisture Problems Early
Water and electrics are not friends. If the car has leaks, damp carpets, or condensation issues, investigate them.
Do Not Ignore Early Symptoms
If the stalk starts acting up, check it early. Intermittent faults often become permanent at the worst possible time.
Is Citroen C1 Indicator Stalk Replacement Worth Doing Yourself?
For many owners, yes. The Citroen C1 is a simple, practical car, and replacing the stalk can be a realistic weekend job if the part is accessible and no airbag removal is needed.
DIY replacement can save money and gives us that small but satisfying “we fixed it” feeling. The kind of feeling that makes the next drive just a little sweeter.
But we should also be honest. Electrical repairs can be sneaky. If the symptoms are unclear, diagnosis matters more than enthusiasm. Replacing parts blindly is like throwing darts in the dark. Sometimes we hit the board, sometimes we hit the wall.
Quick Citroen C1 Indicator Stalk Replacement Checklist
Before starting, use this checklist:
- Confirm the symptoms
- Check bulbs and fuses
- Test hazard lights
- Confirm the correct replacement part
- Disconnect the battery
- Wait before working near the steering column
- Remove column covers carefully
- Photograph wiring connectors
- Replace the stalk gently
- Reconnect everything securely
- Test all lighting and indicator functions
This simple checklist keeps the job calm and organized.
Final Thoughts on Citroen C1 Indicator Stalk Replacement
A faulty indicator stalk may seem like a small inconvenience, but it affects how we communicate on the road. In a car as compact and city-focused as the Citroen C1, clear signaling is essential. Every roundabout, parking move, and lane change depends on it.
The good news is that Citroen C1 indicator stalk replacement is often straightforward when we diagnose properly, buy the right part, and work carefully. We should check the simple things first, respect the steering column electrics, and avoid rushing the plastic trim. The job is not about brute force. It is about patience, attention, and a steady hand.
If the stalk is loose, intermittent, flickering, or refusing to control the indicators correctly, replacement may bring the car back to normal quickly. And once everything clicks, flashes, and lights up as it should, the C1 feels like itself again: small, simple, and ready for the next errand, commute, or narrow city street.
FAQs About Citroen C1 Indicator Stalk Replacement
1. How do I know if my Citroen C1 indicator stalk is faulty?
Common signs include indicators not working from the stalk, signals only working when the lever is held in a certain position, headlights flickering, main beam not staying on, or the stalk feeling loose or crunchy. Before replacing it, check bulbs, fuses, and hazard lights.
2. Can I replace a Citroen C1 indicator stalk myself?
Yes, many owners can replace it themselves if the job only involves removing the steering column covers and unplugging the stalk. However, if steering wheel or airbag removal is required, it is safer to use a professional mechanic.
3. Do I need to disconnect the battery before replacing the indicator stalk?
Yes. Disconnecting the negative battery terminal is strongly recommended because the work is near steering column wiring. Waiting 10–15 minutes after disconnecting the battery adds an extra layer of safety.
4. Are Citroen C1, Peugeot 107, and Toyota Aygo indicator stalks interchangeable?
Some parts may be compatible because these cars share many components, especially early models. However, compatibility depends on year, trim, connector type, fog light controls, and part number. Always compare carefully before buying.
You may be interested in readingCitroen C1 Key Fob Replacement: A Complete Friendly GuideYou may be interested in reading
Citroën C1 Engine Light: What It Means, Causes, and How to Fix ItYou may be interested in reading
Citroen C1 Service Reset: The Complete Step-by-Step Guide We All Need5. Why do my hazard lights work but my indicators do not?
If the hazard lights work but the indicators do not operate from the stalk, the stalk or its wiring may be faulty. However, fuses, connectors, and related electrical components should still be checked before replacing parts.
If you want to know other articles similar to Citroen C1 Indicator Stalk Replacement: A Complete DIY-Friendly Guide you can visit the category Service and Parts.
Vauxhall Antara TPMS Reset: Complete Step-by-Step Guide
Vauxhall Antara Gearbox Oil Capacity: Complete Guide
Vauxhall Antara Kerb Weight: Complete UK Guide
Vauxhall Antara Tyre Size: Complete UK Fitment Guide
Vauxhall Antara Clutch Replacement Cost UK: Complete Price Guide
Vauxhall Antara Fuel Tank Capacity: Complete Guide
Leave a Reply
More content of your interest