

Vauxhall Meriva Code 22: Meaning, Causes, and Easy Fixes

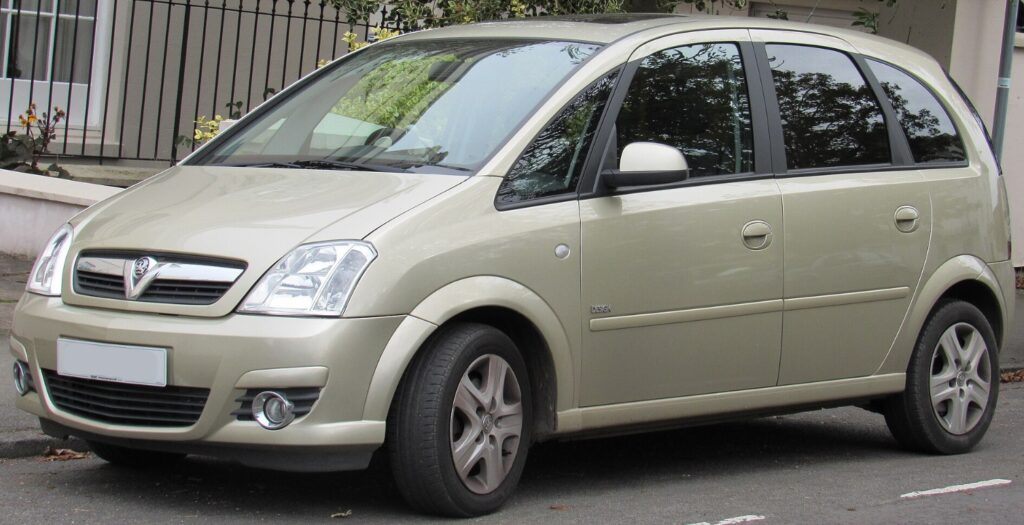
Seeing Vauxhall Meriva Code 22 appear on the dashboard can feel slightly alarming, especially when the car seems to drive normally. The engine starts, no unusual noises appear, and nothing feels mechanically wrong. So, what exactly is the Meriva trying to tell us?
Fortunately, Code 22 usually points to a relatively simple lighting problem rather than an expensive engine, transmission, or electrical-system failure. On the Vauxhall Meriva B, Code 22 commonly indicates a fault involving the right-hand sidelight or position-light circuit. In many cases, the bulb has failed. However, the warning can also appear when the bulb still seems to illuminate because the vehicle has detected abnormal resistance somewhere in the circuit.
That distinction matters. Replacing a visibly dead bulb may solve the problem in minutes, but a persistent Code 22 may require us to inspect the bulb holder, contacts, wiring, earth connection, or replacement LED bulb.
In this guide, we will explain what Code 22 means, how to identify the affected light, how to replace the bulb, and what to check when every lamp appears to be working.
Content in this publication
- What Does Vauxhall Meriva Code 22 Mean?
- Is Code 22 an Engine Fault?
- Which Light Does Code 22 Refer To?
- What Is a Sidelight or Position Light?
- Common Symptoms of Vauxhall Meriva Code 22
- Why Does Code 22 Appear When All the Lights Work?
- Can We Continue Driving With Code 22?
- How to Diagnose Vauxhall Meriva Code 22
- How to Replace the Bulb Causing Code 22
- Which Bulb Should We Buy?
- Will Code 22 Reset Automatically?
- Why Code 22 Remains After Replacing the Bulb
- Can a Fuse Cause Vauxhall Meriva Code 22?
- Could the Body Control Module Be Faulty?
- Vauxhall Meriva Code 21 vs Code 22
- Vauxhall Meriva Code 22 vs an OBD Fault Code
- Mistakes to Avoid When Fixing Code 22
- How Much Does It Cost to Fix Code 22?
- When Should We Visit a Garage?
- How to Prevent Code 22 From Returning
- Quick Troubleshooting Checklist
- Final Thoughts on Vauxhall Meriva Code 22
- Frequently Asked Questions
What Does Vauxhall Meriva Code 22 Mean?
Vauxhall Meriva Code 22 is generally a bulb-failure warning. It tells us that the vehicle’s bulb-monitoring system has detected an electrical problem with the right-hand position or sidelight circuit.
This is not the same as a diagnostic trouble code such as P0300, P0420, or P0171. Those codes are stored in the engine control system and usually require an OBD scanner to read them.
Code 22 is instead a dashboard vehicle message. The Meriva displays it in ordinary language—or as a number—because it wants the driver to inspect an exterior light.
In practical terms, the warning usually means one of the following:
- The right-hand sidelight bulb has blown.
- The bulb filament is beginning to fail.
- The bulb is loose in its holder.
- The contacts are dirty or corroded.
- The wrong bulb type or wattage has been installed.
- An LED replacement is drawing too little current.
- A connector or wire has developed excessive resistance.
- Moisture has entered the light assembly.
The code therefore identifies a circuit, but it does not always identify the exact failed component within that circuit.
Is Code 22 an Engine Fault?
No. Code 22 on the Meriva’s information display is normally not an engine fault.
This distinction can save us a lot of unnecessary worry. Dashboard numbers sometimes look like serious diagnostic codes, but Code 22 is typically associated with exterior lighting rather than the engine management system.
It should not normally cause:
- Engine misfires
- Reduced engine power
- Difficult starting
- Excessive fuel consumption
- Transmission problems
- Limp mode
- Overheating
- Loss of power steering
If one of those symptoms appears at the same time, we may be dealing with an unrelated fault. In that situation, reading the vehicle with a suitable diagnostic scanner would be sensible.
Code 22 by itself, however, usually asks us to inspect a light rather than open the bonnet and start diagnosing the engine.
Which Light Does Code 22 Refer To?
On the Vauxhall Meriva B, Code 22 most commonly refers to the right-hand sidelight, which may also be called the position light, parking light, or tail-position light depending on the market and the section of the lamp assembly being discussed.
This terminology creates some confusion. When people hear “sidelight,” they often look only at the small lamp inside the front headlight. However, the position-light circuit may involve lighting at the front or rear, depending on the vehicle configuration and where the system detects an abnormal load.
Some Meriva owners have solved Code 21 or Code 22 by replacing a small rear position-light bulb rather than a front bulb. Repair demonstrations involving the Meriva B also show these codes being cleared after work on the rear lamp assembly.
Because equipment can vary by model year and specification, we should inspect the entire right-hand lighting system rather than assuming the first visible bulb is the culprit.
Right-Hand Side Means Which Side?
Vehicle manufacturers normally describe left and right from the driver’s seated position while facing forward.
Therefore:
- Right-hand side: the vehicle’s right side when seated inside it
- Left-hand side: the vehicle’s left side when seated inside it
On a right-hand-drive UK Vauxhall Meriva, the right side is normally the driver’s side. On an Opel Meriva configured for left-hand-drive markets, the right side is normally the passenger side.
This sounds obvious, but people regularly replace a bulb on the wrong side because they stand in front of the vehicle and interpret left and right from their own viewpoint.
What Is a Sidelight or Position Light?
A sidelight is a low-intensity exterior lamp used to make the vehicle visible without producing the strong illumination of a dipped headlight.
We normally use sidelights:
- Around dusk
- In poor visibility
- When parked in certain conditions
- Alongside dipped headlights
- As part of the vehicle’s position-light system
They are not designed to illuminate a dark road. Instead, they outline the vehicle’s presence and width.
Think of them as the car’s quiet introduction. Headlights shout, “Here is the road.” Sidelights simply say, “Here I am.”
Because sidelights are relatively small, a failed one can be difficult to notice during daylight. The dashboard monitoring system may detect the electrical problem before we notice any visible difference.
Common Symptoms of Vauxhall Meriva Code 22
The dashboard message may appear in several different circumstances.
The most common symptoms include:
- Code 22 appearing after the ignition is switched on
- Code 22 appearing when the exterior lights are activated
- A right-hand position light that does not illuminate
- A bulb that works intermittently
- A light that looks dimmer than the matching lamp
- A warning that disappears after tapping the lamp assembly
- A warning that remains after bulb replacement
- Code 22 appearing after LED bulbs have been fitted
- The message returning when driving over bumps
- Corrosion or heat damage inside the bulb holder
Sometimes the warning appears and disappears unpredictably. That behaviour often points toward a poor connection rather than a completely blown bulb.
Why Does Code 22 Appear When All the Lights Work?
This is one of the most frustrating versions of the problem. We walk around the vehicle, switch on every light, and everything appears normal. Yet Code 22 remains on the display like an uninvited guest refusing to leave.
The explanation is that the Meriva does not inspect bulbs visually. It monitors electrical behaviour.
A lamp can still produce light while drawing an abnormal amount of current. A damaged filament may reconnect temporarily, a corroded contact may create additional resistance, or an incorrect bulb may consume a different amount of power from the expected value.
The system may therefore detect a fault even though our eyes still see light.
The Bulb May Be Close to Failing
Traditional filament bulbs do not always fail instantly. The filament can weaken, deform, or make an intermittent connection.
A bulb in this condition may:
- Illuminate when cold
- Fail after warming up
- Flicker while driving
- Work after the lamp is tapped
- Produce less light than normal
- Trigger a warning before complete failure
Comparing the right-hand bulb with the equivalent left-hand bulb can reveal a small difference in brightness that would otherwise be easy to miss.
The Contacts May Be Corroded
Bulb holders live in a harsh environment. They experience heat, vibration, condensation, and temperature changes. Over time, the metal contacts can become dull, oxidised, or corroded.
Even a thin layer of corrosion can increase electrical resistance.
The bulb may still illuminate, but the vehicle may interpret the altered current as a failing lamp. Green or white deposits, darkened terminals, and moisture marks are all signs that the connection needs attention.
The Wrong Bulb May Be Installed
Two bulbs can look almost identical while having different wattage ratings or base designs.
Installing an incorrect bulb may result in:
- Reduced brightness
- Excessive heat
- A dashboard warning
- Premature bulb failure
- Damage to the holder
- Intermittent operation
We should always match the replacement bulb to the vehicle specification or compare its markings with the original bulb.
An LED Bulb Can Trigger the Warning
LED replacement bulbs generally consume less electricity than traditional halogen or incandescent bulbs. That efficiency is useful, but it can confuse a vehicle designed to monitor the current draw of a conventional filament bulb.
The Meriva may interpret the lower resistance or current draw as an open circuit and display Code 22, even though the LED illuminates perfectly.
So-called CAN-bus-compatible LEDs attempt to mimic the electrical load of a conventional bulb, but compatibility varies. Some work without any warning, while others still trigger dashboard messages.
If Code 22 appeared immediately after an LED conversion, reinstalling a correct conventional bulb is one of the fastest diagnostic tests.
Can We Continue Driving With Code 22?
The car will generally remain driveable because Code 22 does not normally indicate a mechanical breakdown. However, that does not mean we should ignore it indefinitely.
Exterior lights are safety equipment. A failed position light can make the vehicle harder to see at night, during rain, or in poor visibility. It may also create inspection or roadworthiness problems.
Before driving after dark, we should check:
- Front sidelights
- Rear position lights
- Brake lights
- Indicators
- Dipped headlights
- Number-plate lights
- Fog lights, where fitted
If a major light such as a brake lamp or headlight is not working, repairing it should be treated as a priority.
Code 22 itself will not usually damage the engine, but the underlying lighting fault can still affect safety.
How to Diagnose Vauxhall Meriva Code 22
A methodical check is quicker than replacing random bulbs. We want to follow the circuit logically, beginning with the easiest and most common causes.
Step 1: Activate the Exterior Lights
Park the vehicle safely on level ground and switch on the sidelights.
Walk around the Meriva and inspect both sides. Comparing one side with the other makes subtle faults easier to identify.
Check for:
- A lamp that is completely dark
- Unequal brightness
- Flickering
- Delayed illumination
- A yellow or blackened bulb
- Condensation inside the housing
A wall or garage door can make the front light comparison easier. At the rear, ask another person to operate the controls while we observe the lamps.
Step 2: Check More Than One Lighting Function
Some lamp assemblies contain multiple bulbs or dual-filament bulbs. A single bulb may perform more than one role.
For example, one filament might act as a position light while another provides a brighter brake-light function. The brake light can work while the lower-power tail-light filament has failed.
Test each function independently:
- Sidelights
- Dipped headlights
- Main beam
- Brake lights
- Indicators
- Hazard lights
- Reverse lights
- Rear fog light
- Number-plate lights
Do not assume that seeing one section of the lamp illuminate proves every circuit inside it is healthy.
Step 3: Inspect the Right-Hand Bulb
Once we identify the likely lamp, remove the bulb according to the procedure in the owner’s manual.
Inspect it closely. A failed filament may be clearly broken, but not always. Look for:
- A separated filament
- Cloudy or blackened glass
- Melted plastic
- Burnt contacts
- A loose base
- Distorted terminals
- Signs of overheating
When the bulb looks questionable, replacement is usually more practical than trying to test it visually.
Step 4: Swap Bulbs for Testing
When both sides use identical bulbs, swapping the left and right bulbs can be a useful diagnostic method.
If the fault moves to the opposite side, the bulb is defective.
If Code 22 remains associated with the right-hand circuit, the problem is more likely to involve:
- The bulb holder
- Wiring
- Connector terminals
- Earth connection
- Lamp assembly
- Control module output
Only swap bulbs when they are genuinely identical in specification and condition.
Step 5: Examine the Bulb Holder
Remove the bulb and inspect the holder with a torch.
Healthy contacts should generally appear clean and properly shaped. Warning signs include:
- Green corrosion
- White powdery deposits
- Black burn marks
- Melted plastic
- Loose metal tabs
- Moisture
- A contact pushed too far back
- Cracked plastic around the socket
A bulb holder that no longer grips the bulb securely can create intermittent faults whenever the car vibrates.
Cleaning the Contacts Safely
Switch the ignition and lighting controls off before working on the holder.
A suitable electrical contact cleaner can be used to remove light contamination. Allow the connector to dry fully before refitting the bulb.
Avoid using excessive force, coarse abrasives, or random household chemicals. The terminals are small and can be damaged easily.
If a contact is burnt, loose, or badly corroded, replacing the holder or connector is usually more reliable than repeatedly cleaning it.
Step 6: Look for Water Inside the Lamp
Condensation can occur temporarily, but standing water or heavy moisture suggests a sealing problem.
Water inside the lamp can corrode:
- Bulb contacts
- Printed circuits
- Connectors
- Earth terminals
- Lamp-control components
If we replace the bulb without addressing the leak, Code 22 may return.
Check the lamp seal, rear cover, ventilation points, and housing for damage. A cracked lens or poorly fitted access cap can allow moisture to enter.
Step 7: Check the Connector and Wiring
Where the bulb and holder appear healthy, inspect the connector.
Gently look for:
- Loose plugs
- Bent pins
- Broken locking tabs
- Frayed wires
- Damaged insulation
- Wires stretched near hinges or trim
- Previous repair work
- Heat-discoloured terminals
Do not pull directly on the wires. Release the connector using its locking mechanism.
An intermittent Code 22 that appears after opening the tailgate or driving over rough roads may point toward movement in the wiring or connector.
Step 8: Test the Electrical Supply
A multimeter can help determine whether the circuit is receiving the correct supply and has a reliable earth.
Useful checks include:
- Supply voltage at the bulb holder
- Continuity through the bulb
- Resistance across the earth path
- Voltage drop under load
- Continuity through suspect wiring
A basic voltage reading can sometimes look normal even when the connection fails under load. Voltage-drop testing is often more useful for identifying high-resistance connections.
Electrical testing should be performed carefully. Accidentally bridging terminals can damage a fuse or electronic control unit. When we are not comfortable using a multimeter, an auto electrician can diagnose the circuit without guesswork.
How to Replace the Bulb Causing Code 22
The exact procedure depends on whether the affected lamp is at the front or rear and on the Meriva’s model year and equipment.
The general process is straightforward.
Front Sidelight Bulb Replacement
A typical front replacement involves:
- Switching off the ignition and all exterior lights.
- Opening the bonnet.
- Locating the rear access cover of the right-hand headlamp.
- Removing the cover carefully.
- Identifying the position-light bulb holder.
- Twisting or pulling out the holder as designed.
- Removing the old bulb.
- Installing the correct replacement.
- Refitting the holder and access cover.
- Testing the light before closing the bonnet.
Space behind the headlamp can be tight. Work patiently rather than forcing the holder.
Avoid touching the glass of a halogen headlight bulb with bare fingers. Position-light bulbs may have a different design, but keeping all replacement bulbs clean is still good practice.
Rear Position-Light Bulb Replacement
A typical rear replacement may involve:
- Opening the tailgate.
- Locating the lamp-access area or retaining fasteners.
- Removing the necessary trim or covers.
- Supporting the lamp while removing its fixings.
- Disconnecting the electrical plug if required.
- Removing the bulb carrier.
- Identifying the failed position-light bulb.
- Installing a matching replacement.
- Inspecting the carrier contacts.
- Refitting the carrier, connector, lamp, and trim.
Meriva B repair demonstrations show Code 21 and Code 22 being addressed through replacement of small bulbs in the rear lamp assembly.
Do not overtighten lamp fasteners. Plastic housings can crack, and a damaged seal may later allow water to enter.
Which Bulb Should We Buy?
The safest method is to confirm the bulb specification using:
- The owner’s handbook
- The markings on the original bulb
- A reputable parts catalogue using the registration number
- A Vauxhall parts department
- A trusted motor-factor database
Do not rely solely on appearance.
A replacement bulb should match the original in:
- Voltage
- Wattage
- Base type
- Pin arrangement
- Physical size
- Filament configuration
Cheap, poorly manufactured bulbs may have inaccurate resistance, weak filaments, or badly formed contacts. Since the Meriva monitors the circuit electrically, bulb quality can make the difference between a permanent repair and a warning that returns next week.
Will Code 22 Reset Automatically?
In many cases, yes.
Once the correct bulb is installed and the electrical circuit returns to its expected condition, Code 22 may disappear automatically after:
- Switching the ignition off and on
- Turning the lights off and on
- Starting the engine again
- Driving for a short period
- Completing another bulb-monitoring check
There is usually no special dashboard reset procedure for an ordinary bulb failure.
The code is a messenger, not the fault itself. When the circuit becomes healthy, the messenger normally leaves.
If the warning remains, repeatedly clearing the display will not solve the underlying electrical problem.
Why Code 22 Remains After Replacing the Bulb
A new bulb does not guarantee that the circuit is fixed.
When Code 22 stays on, consider the following possibilities.
The New Bulb Is Incorrect
The bulb may fit physically but have the wrong wattage or electrical characteristics.
Compare its markings with the removed bulb and the official specification.
The Replacement Bulb Is Defective
New parts can fail. A weak filament, poor internal connection, or manufacturing fault may trigger the same warning.
Testing with another known-quality bulb can rule this out.
The Holder Has Poor Contact
Removing and reinstalling the bulb can temporarily disturb a corroded connection without repairing it.
Inspect the contact surfaces carefully and confirm that the bulb sits firmly.
The Fault Is in Another Position Light
Code descriptions can be interpreted too narrowly. Check the complete right-hand lighting circuit, including the rear position light and related lamps.
An LED Is Causing the Warning
If an LED replacement has been installed, return the circuit to its original bulb specification as a test.
The Earth Connection Is Weak
A poor earth can produce strange lighting behaviour. One lamp may dim when another is activated, an indicator may flash unusually, or several bulbs may glow faintly.
A weak earth may exist at the lamp carrier, connector, body ground, or wiring junction.
There Is Heat Damage in the Lamp Carrier
Darkened or melted plastic suggests excessive resistance and heat.
Simply fitting another bulb may not restore a stable connection. The carrier or connector may need replacement.
Can a Fuse Cause Vauxhall Meriva Code 22?
It is possible, but a fuse is not normally the first suspect when only one monitored lamp triggers a warning.
A blown fuse often affects several lights or an entire circuit. If multiple lamps have stopped working, checking the relevant fuse becomes more important.
Use the fuse diagram for the exact model year and specification. Never replace a fuse with one of a higher rating. A fuse protects the wiring, and increasing its rating can allow dangerous overheating before it blows.
When a replacement fuse fails again, there is likely a short circuit that requires diagnosis.
Could the Body Control Module Be Faulty?
The body control module, or BCM, manages and monitors many electrical functions, including exterior lighting. A module fault can theoretically create incorrect warnings, but it is far less common than a failed bulb or poor connection.
We should not blame the BCM until the simpler causes have been ruled out.
Before considering module repair or replacement, confirm:
- The correct bulb is fitted.
- The bulb is known to be good.
- The holder is clean and undamaged.
- Supply voltage is present.
- The earth circuit is sound.
- Wiring continuity is good.
- Connectors are secure.
- No moisture is present.
- Related fuses are intact.
Module replacement may require programming or configuration. It is not a sensible first step for a warning usually caused by a low-cost bulb.
Vauxhall Meriva Code 21 vs Code 22
Code 21 and Code 22 are closely related lighting warnings.
In general, they distinguish faults on opposite sides of a position-light circuit:
- Code 21: commonly associated with a left-hand sidelight or position-light fault
- Code 22: commonly associated with a right-hand sidelight or position-light fault
Both codes can stem from the same types of problems:
- Blown bulbs
- Incorrect wattage
- Corroded contacts
- Loose bulb holders
- LED conversions
- Damaged wiring
- Poor earth connections
- Moisture inside the lamp
When both codes appear together, inspect both sides and consider whether matching aftermarket bulbs or a shared electrical connection has created the problem.
Vauxhall Meriva Code 22 vs an OBD Fault Code
Understanding the difference prevents unnecessary diagnostic work.
Dashboard Vehicle Code
Code 22 appears as a vehicle message on the instrument display. It usually relates to an exterior-light fault and can often be repaired without a diagnostic scanner.
OBD Diagnostic Trouble Code
An OBD trouble code normally begins with a letter, such as:
- P for powertrain
- B for body
- C for chassis
- U for network communication
Examples include P0301 or U0100.
These codes are stored by electronic modules and read through the diagnostic socket.
Scanning the vehicle can still be helpful when Code 22 persists, particularly if the BCM has stored a more detailed body-system fault. However, an ordinary engine-code reader may not communicate with every body module.
Mistakes to Avoid When Fixing Code 22
A simple lighting fault can become more complicated when we rush.
Avoid these common mistakes:
- Replacing the wrong-side bulb
- Inspecting only the front lamp
- Assuming a glowing bulb must be healthy
- Installing an incorrect wattage
- Using an incompatible LED
- Touching dirty contacts and immediately refitting the bulb
- Forcing a fragile bulb holder
- Pulling a connector by its wires
- Ignoring condensation
- Overtightening lamp fasteners
- Installing a higher-rated fuse
- Replacing the BCM before testing the circuit
- Clearing the warning without repairing the cause
A calm ten-minute inspection often saves an unnecessary trip to the garage.
How Much Does It Cost to Fix Code 22?
The cost depends on the actual cause.
A standard bulb is usually inexpensive, and many owners can replace it at home with basic tools. A garage may charge a modest labour fee, particularly when access to the lamp is awkward.
Costs increase when the fault involves:
- A damaged bulb holder
- A melted lamp carrier
- Corroded wiring
- A replacement connector
- Water-damaged lamp components
- A complete lamp assembly
- BCM diagnosis or programming
The best financial approach is to diagnose from the cheapest and most likely cause upward.
Start with the bulb. Then inspect the holder, connector, earth, and wiring. Only after those checks should we consider expensive electronic components.
When Should We Visit a Garage?
Professional diagnosis is sensible when:
- The warning remains after fitting the correct bulb.
- The bulb holder is melted or badly corroded.
- Several lights behave strangely.
- A fuse repeatedly blows.
- Wiring insulation is damaged.
- Water keeps entering the lamp.
- The warning appears intermittently with no visible cause.
- No voltage reaches the bulb holder.
- We suspect a BCM or control-module fault.
- We are uncomfortable removing the lamp assembly.
- The car is due for a roadworthiness inspection.
An auto electrician may be the best choice for persistent faults. Electrical problems can hide behind trim and connectors like a whisper behind a wall. Proper voltage-drop testing often reveals them faster than replacing parts at random.
How to Prevent Code 22 From Returning
We cannot prevent every bulb from ageing, but a few habits can reduce repeat problems.
Use Quality Replacement Bulbs
Choose bulbs from reputable manufacturers and match the original specification.
Replace Matching Bulbs in Pairs When Appropriate
When two identical bulbs have operated for the same number of hours, the second may fail soon after the first. Replacing a pair can improve consistency, although it is not always essential for every position-light application.
Keep Lamp Covers Properly Sealed
Refit access covers carefully. A cover left loose after bulb replacement can allow moisture and dirt into the housing.
Address Condensation Early
Occasional light misting may clear naturally, but persistent droplets or standing water deserve attention.
Avoid Unverified LED Conversions
LEDs can look modern, but an incompatible bulb may create warnings, uneven light output, glare, or unreliable operation.
Inspect the Lights Regularly
A monthly walk-around check takes only a few minutes.
Test:
- Sidelights
- Headlights
- Brake lights
- Indicators
- Hazard lights
- Reverse lights
- Fog lights
- Number-plate lamps
Regular checks help us spot a dim or intermittent bulb before the dashboard warning becomes permanent.
Quick Troubleshooting Checklist
When Vauxhall Meriva Code 22 appears, use this sequence:
- Confirm that the message is Code 22.
- Switch on the exterior lights.
- Inspect the vehicle’s right-hand front and rear lamps.
- Compare brightness with the left-hand side.
- Test every lighting function separately.
- Remove and inspect the suspected bulb.
- Install the correct quality replacement.
- Check the bulb-holder contacts.
- Look for moisture or heat damage.
- Refit all covers and connectors securely.
- Cycle the ignition and lights.
- Recheck the dashboard.
- Inspect wiring and earth connections if the code remains.
- Test with a multimeter or seek professional diagnosis.
- Avoid replacing control modules without evidence.
This order keeps the repair logical and prevents unnecessary spending.
Final Thoughts on Vauxhall Meriva Code 22
Vauxhall Meriva Code 22 usually looks more serious than it is. In most cases, it points to a fault in the right-hand sidelight or position-light circuit, commonly caused by a failed bulb, poor contact, or incorrect replacement lamp.
The first step is a complete lighting inspection—not merely a quick glance at the front headlamp. Check the right-hand front and rear position lights, compare brightness, test every function, and inspect the bulb holder for corrosion or heat damage.
When all lights appear to work, remember that the vehicle is measuring electrical behaviour rather than simply checking whether a lamp glows. A weakened filament, loose contact, wrong wattage, or low-consumption LED can trigger the warning.
Most repairs are simple and inexpensive. By moving logically from the bulb to the holder, connector, wiring, and earth circuit, we can usually solve Code 22 without replacing costly components or guessing blindly.
Frequently Asked Questions
1. What does Code 22 mean on a Vauxhall Meriva?
Code 22 generally indicates a fault with the right-hand sidelight or position-light circuit. The most common cause is a blown bulb, although poor contacts, wiring faults, or incompatible LED bulbs can also trigger it.
2. Why does my Meriva show Code 22 when the bulb works?
The bulb may still illuminate while drawing an abnormal amount of current. A weak filament, corrosion, incorrect wattage, loose holder, or LED conversion can cause the monitoring system to detect a fault.
3. Does Vauxhall Meriva Code 22 need an OBD scanner?
Usually not. Code 22 is normally a dashboard vehicle message rather than a standard engine diagnostic code. Start by inspecting and replacing the relevant bulb. A scanner may help only when the warning persists and a body-control fault is suspected.
4. Will Code 22 clear after replacing the bulb?
It normally clears automatically once the correct bulb is installed and the circuit operates properly. Switching the ignition and lights off and back on may prompt another system check.
5. Is it safe to drive with Code 22 showing?
The vehicle will usually remain mechanically driveable, but the affected exterior light may reduce visibility or create a roadworthiness issue. Check all lights before driving at night or in poor weather and repair the fault promptly.
If you want to know other articles similar to Vauxhall Meriva Code 22: Meaning, Causes, and Easy Fixes you can visit the category Service and Parts.
Nissan Rogue Oil Change Cost: Prices, Service Options, and What to Expect
Nissan Rogue Key Battery Replacement: Easy Step-by-Step Guide
Nissan Rogue Oil Change Interval: Complete Guide by Model Year
Nissan Rogue Brake Pads and Rotors Cost: Complete 2026 Guide
Kia Sorento Service Reset: How to Reset the Service Light
Kia Sorento Fuel Tank Capacity: Gallons, Litres and Model Differences
Leave a Reply
More content of your interest