

Vauxhall Meriva Tyre Pressure Reset: Complete TPMS Guide

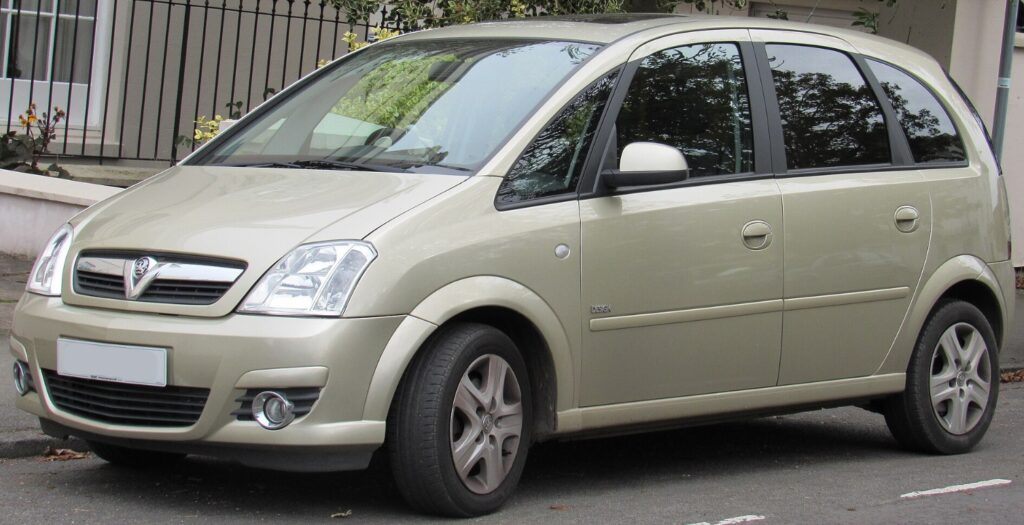
A Vauxhall Meriva tyre pressure reset should be a simple job. You inflate the tyres, press a few buttons, drive away, and expect the warning light to disappear. Yet the little amber horseshoe-shaped symbol sometimes behaves like an unwanted dashboard guest—it arrives without warning and refuses to leave.
The confusion usually comes from treating every warning as the same problem. It is not. Your Meriva might simply need its tyre pressures corrected. It may need the selected tyre-load setting changed. It could require a short drive so the system can update. After changing or rotating wheels, the pressure sensors may need to be matched to their new positions with a relearn tool.
Before pressing buttons at random, we need to identify what the car is actually asking for.
In this guide, we explain how to reset the tyre-pressure warning on a Vauxhall Meriva, how the procedure varies by model and system, what to do when the light remains illuminated, and when a reset tool or professional diagnosis becomes necessary.
Content in this publication
- Quick Vauxhall Meriva Tyre Pressure Reset
- What Does the Tyre Pressure Warning Light Mean?
- Where to Find the Correct Meriva Tyre Pressure
- Before Resetting the Vauxhall Meriva TPMS
- How to Reset the Vauxhall Meriva B Tyre Pressure Light
- Does the Meriva Warning Light Reset Automatically?
- Tyre Pressure Reset Versus Sensor Relearning
- How to Relearn Vauxhall Meriva TPMS Sensors
- Resetting the Warning After Inflating a Low Tyre
- Resetting After a Tyre Change
- Resetting After Wheel Rotation
- Resetting After Fitting Winter Wheels
- Why the Vauxhall Meriva Tyre Pressure Light Will Not Reset
- The Tyres Are Not Actually at the Correct Pressure
- The Car Needs to Be Driven
- The Wrong Tyre-Load Setting Is Selected
- A Tyre Has a Slow Puncture
- A Sensor Battery Has Failed
- A Sensor Was Damaged During Tyre Fitting
- The Replacement Sensor Is Incompatible
- The Sensors Were Not Matched
- Electronic Interference Is Disrupting the System
- A Repair Sealant Has Affected the Sensor
- Can We Reset the Meriva TPMS Without a Tool?
- Common Mistakes During a Tyre Pressure Reset
- How Long Should the Reset Take?
- Is It Safe to Drive With the Warning Light On?
- When Should We Visit a Workshop?
- How to Prevent Future Tyre Pressure Warnings
- Vauxhall Meriva Tyre Pressure Reset Checklist
- Final Thoughts on the Vauxhall Meriva Tyre Pressure Reset
- Frequently Asked Questions
- 1. How do I reset the tyre pressure light on a Vauxhall Meriva?
- 2. Why is my Meriva tyre pressure light still on after inflation?
- 3. Do I need a TPMS reset tool for a Vauxhall Meriva?
- 4. What does a flashing tyre pressure light mean on a Meriva?
- 5. Will disconnecting the battery reset the Meriva tyre pressure warning?
Quick Vauxhall Meriva Tyre Pressure Reset
For many Vauxhall Meriva B models, start with this basic procedure:
- Park safely on level ground.
- Allow the tyres to cool.
- Check all four tyre pressures with an accurate gauge.
- Inflate them to the figures shown on the vehicle’s tyre-pressure label.
- Switch the ignition on without necessarily starting the engine.
- Press MENU on the indicator stalk.
- Open the Vehicle Information Menu.
- Rotate the adjuster wheel to find the tyre-pressure or tyre-load screen.
- Select the correct load setting where applicable.
- Press SET/CLR if the display offers a confirmation or reset option.
- Confirm the selection.
- Drive normally for several minutes so the system can update.
On later Meriva models with direct pressure sensors, merely correcting the air pressure may be enough. Vauxhall states that driving may be required before the updated readings appear in the Driver Information Centre.
However, this process will not repair a puncture, revive a failed sensor battery or match sensors after their wheel positions have changed. That is why we need to look more closely.
What Does the Tyre Pressure Warning Light Mean?
The tyre-pressure warning resembles a flattened tyre containing an exclamation mark. It can illuminate in several ways, and the behaviour of the light gives us an important clue.
A Solid Tyre Pressure Light
A solid amber warning usually means the car has detected low pressure in one or more tyres.
Stop somewhere safe and inspect the tyres. Do not assume that the warning is false simply because the car still drives normally. A tyre can lose a meaningful amount of pressure without looking obviously flat.
Check all four tyres rather than inspecting only the one that appears soft.
A Flashing Light That Becomes Solid
When the warning flashes for roughly a minute and then remains illuminated, it generally indicates a fault within the monitoring system rather than ordinary low pressure. The official Meriva manual describes a warning that flashes for 60 to 90 seconds before staying on as a system malfunction that should be checked by a workshop.
Possible causes include:
- A failed tyre-pressure sensor
- A depleted sensor battery
- A sensor that has not been matched correctly
- An incompatible replacement wheel
- Radio-frequency interference
- Damage to a sensor during tyre replacement
- A missing sensor on one of the wheels
A dashboard reset cannot normally cure these faults.
A Warning That Appears on Cold Mornings
Tyre pressure falls as the surrounding temperature drops. That is why a warning may appear during a cold morning and disappear after the tyres warm while driving.
We should not simply ignore it. The warming tyre may temporarily raise the displayed pressure, but its cold inflation pressure could still be too low.
Check the pressures when the tyres are cold and adjust them to the vehicle specification rather than adding an arbitrary amount of air.
Where to Find the Correct Meriva Tyre Pressure
There is no single correct pressure for every Vauxhall Meriva. The recommended figure can vary according to:
- Model year
- Engine
- Tyre size
- Wheel diameter
- Passenger load
- Luggage weight
- Comfort, economy or full-load setting
The safest reference is the tyre-pressure information label fitted to the car. Depending on the year and market, it may be located on a door frame, door pillar or inside the fuel-filler area.
Later Meriva documentation places the pressure label on the right-hand door frame and explains that the figures apply to cold tyres.
Why We Should Not Copy Pressures From Another Car
Two Merivas parked side by side may look almost identical but use different tyre sizes or load recommendations. Copying a figure from an online forum is like borrowing somebody else’s shoes because they appear to be the same size. They might fit—or they might cause trouble.
Use, in this order:
- The label fitted to your vehicle
- The owner’s manual for the correct model year
- A trusted Vauxhall service source
- A reputable tyre specialist
Never use the maximum pressure printed on the tyre sidewall as the normal operating recommendation. That marking relates to the tyre’s limits, not necessarily the pressure selected by the vehicle manufacturer.
Before Resetting the Vauxhall Meriva TPMS
A reset should be the final step, not the first. Before touching the controls, carry out a quick inspection.
Let the Tyres Cool
Recommended pressures normally refer to cold tyres. Ideally, check them before driving or after the car has stood for several hours.
Driving heats the tyres and raises the pressure. Releasing air from a warm tyre can leave it underinflated once it cools.
Inspect Every Tyre
Look for:
- Nails or screws
- Cuts in the sidewall
- Cracks around the tread
- Bulges or distorted areas
- A damaged valve
- Uneven wear
- A wheel sitting visibly lower than the others
Do not attempt to reset the warning repeatedly if a tyre is losing air. The warning is the messenger, not the culprit.
Use a Reliable Pressure Gauge
Petrol-station inflators are convenient, but their gauges can be worn or poorly calibrated. A small digital gauge provides a useful second opinion.
Measure each tyre, note the result, and adjust it carefully.
Check the Valve Caps
A valve cap does not normally provide the primary air seal, but it protects the valve core from dirt, water and corrosion. Replace any missing caps.
Confirm the Vehicle Load Setting
Some later Meriva B versions let us select a pressure reference according to how the vehicle is loaded. The available settings may include:
- Light: Comfort pressure for up to three occupants
- Eco: Economy-oriented pressure for up to three occupants
- Max: Pressure appropriate for a fully loaded vehicle
The car uses the selected setting as a reference when deciding whether to issue a pressure warning.
If the tyres are inflated for a light load but the system is set to Max, the warning logic may not correspond with the pressures you expect.
How to Reset the Vauxhall Meriva B Tyre Pressure Light
The Meriva B was sold from around 2010 to 2017, but its equipment evolved over that period. Button labels, menus and monitoring functions can therefore differ.
The following method applies broadly to versions using the indicator-stalk controls and Driver Information Centre.
Step 1: Park the Vehicle Safely
Stop on level ground and apply the parking brake.
For an automatic transmission, select P. For a manual transmission, place the gearbox in neutral when carrying out a sensor-matching procedure.
Step 2: Check the Tyre Pressures
Measure all four tyres while they are cold.
Inflate or deflate each tyre according to the pressure label. When changing the pressure on models with direct monitoring, Vauxhall advises switching off the ignition first.
Step 3: Switch On the Ignition
Turn the key to the ignition-on position. On vehicles with push-button starting, activate the ignition without starting the engine if the system allows it.
The dashboard should illuminate.
Press the MENU button on the turn-signal or indicator stalk.
Cycle through the available pages until the Driver Information Centre shows the Vehicle Information Menu.
Step 5: Find the Tyre Pressure Display
Rotate the adjuster wheel on the stalk.
Look for one of the following descriptions:
- Tyre Pressure
- Tyre Pressure System
- Tyre Load
- TPMS
- Pressure values for each wheel
The exact wording depends on the display and model year.
Step 6: Select the Correct Tyre-Load Mode
When a Tyre Load screen is available, choose Light, Eco or Max according to the pressure you have used and the vehicle’s current load.
The menu may only appear while the vehicle is stationary with the parking brake applied. On automatic versions, the selector may also need to be in Park.
Step 7: Press SET/CLR
Press SET/CLR on the end of the stalk if the display requests confirmation.
Some versions use this action to save the selected tyre-load reference. Others use it to begin a sensor-matching process. Read the message on the display carefully before confirming.
Do not start sensor relearning unless you intend to match the wheel sensors and have the correct activation tool available.
Step 8: Drive the Vehicle
Switch off the ignition, restart the car and drive normally.
The monitoring system may need a period of driving before it recognises the corrected pressures and refreshes the displayed readings. The warning can remain on during this update period.
Avoid immediately concluding that the reset has failed.
Does the Meriva Warning Light Reset Automatically?
On many direct-monitoring versions, yes. Once the tyre has been inflated correctly, the system reads the new pressure and updates after driving.
This is not the same as clearing a stored engine fault code. The TPMS continues to monitor live pressure. Once the condition that triggered the warning no longer exists, the light should extinguish.
A manual menu operation may still be needed when:
- The tyre-load reference is incorrect
- Wheels have been rotated
- A wheel set has been changed
- One or more sensors have been replaced
- The car has forgotten sensor positions
- The system specifically requests relearning
The key lesson is simple: pressure correction and sensor matching are different jobs.
Tyre Pressure Reset Versus Sensor Relearning
These phrases are often used as though they mean the same thing, but they do not.
Tyre Pressure Reset
A normal pressure reset means:
- Finding the cause of low pressure
- Inflating the tyres correctly
- Selecting the appropriate load setting
- Allowing the car to update its readings
No special electronic tool may be needed.
TPMS Sensor Relearning
Sensor relearning assigns each sensor’s unique identification code to its physical wheel position.
The car needs to know which transmitter belongs to:
- Left front
- Right front
- Right rear
- Left rear
Without correct matching, the display may show the wrong wheel as low or report a system malfunction.
A relearn is commonly required after:
- Rotating the tyres
- Swapping front and rear wheels
- Installing winter wheels
- Replacing a sensor
- Replacing a complete wheel
- Refitting a road wheel after using a temporary spare
How to Relearn Vauxhall Meriva TPMS Sensors
Later Meriva B models with direct sensors may require an electronic TPMS activation tool.
This procedure is more involved than an ordinary warning-light reset. The official manual specifies a set order and limited time in which to complete the operation.
Equipment Required
You may need:
- A compatible TPMS relearn tool
- An accurate tyre-pressure gauge
- Access to the vehicle’s information display
- The correct pressure specification
- Enough time to complete all four wheels without interruption
Enter Relearn Mode
- Apply the parking brake.
- Switch on the ignition.
- Put an automatic transmission in P, or a manual transmission in neutral.
- Press MENU on the indicator stalk.
- Select the Vehicle Information Menu.
- Rotate the adjuster wheel to the tyre-pressure menu.
- Press SET/CLR to begin sensor matching.
- Confirm the request by pressing SET/CLR again.
- Listen for two horn sounds indicating that relearn mode is active.
Match the Sensors in the Correct Order
The required sequence is:
- Left-front wheel
- Right-front wheel
- Right-rear wheel
- Left-rear wheel
Place the relearn tool against the tyre sidewall near the valve stem. Activate the tool and wait for a horn chirp or the confirmation described by the vehicle.
Move to the next wheel only after the current sensor has been accepted.
The official process allows approximately two minutes to match the first position and five minutes overall for all four wheels. If the operation takes too long, the procedure stops and must be restarted.
Complete the Process
After matching the fourth wheel:
- Listen for final confirmation.
- Switch off the ignition.
- Set all four tyres to the recommended cold pressures.
- Confirm that the tyre-load status matches the selected pressures.
- Restart the vehicle.
- Check the display.
- Take a short drive if the readings do not update immediately.
Do Not Confuse a Horn Chirp With an Alarm
The horn sounds are part of the matching procedure. They confirm that the system has entered relearn mode or accepted a sensor. They do not indicate that you have damaged the vehicle.
Resetting the Warning After Inflating a Low Tyre
Suppose the light appeared, you found one tyre slightly low, and no puncture was visible. The practical sequence is:
- Inflate all four tyres to their correct cold values.
- Inspect the previously low tyre carefully.
- Switch on the ignition.
- Confirm the correct tyre-load mode.
- Start the engine.
- Drive for 10 to 20 minutes at normal road speeds.
- Recheck the display.
If the warning disappears but returns the next morning, the tyre probably has a slow leak. Look for a nail, leaking valve, bead leak or damaged wheel.
A reset should not become a daily ritual. Repeated pressure loss requires repair.
Resetting After a Tyre Change
A tyre replacement does not always require sensor relearning.
When the original wheel and original sensor remain in the same vehicle position, the car may continue to recognise the sensor normally. However, the technician must take care not to damage the sensor while removing or installing the tyre.
Relearning may be required when:
- The wheel is moved to another corner
- A different wheel is installed
- The sensor is replaced
- The sensor identity is lost
- The display reports the incorrect wheel position
Later Meriva documentation also notes that sensor components may require servicing during tyre replacement. Sensor-valve seals, valve cores or complete valve stems may need renewal depending on the sensor design.
Resetting After Wheel Rotation
Wheel rotation changes the physical location of each sensor.
Imagine that the front-left sensor is moved to the rear-left position. Unless the system relearns that change, the display may continue calling it the front-left wheel.
The pressures can still be measured, but the displayed location may be wrong. That becomes especially confusing when diagnosing a slow puncture.
After rotating wheels:
- Set every tyre to the correct pressure.
- Enter sensor-matching mode.
- Activate each sensor in the official order.
- Confirm completion.
- Verify the displayed wheel positions.
Resetting After Fitting Winter Wheels
A second wheel set creates two possible situations.
Winter Wheels With Compatible Sensors
Install the wheels, set the correct pressures and perform the matching process. Once recognised, the display should show the individual readings normally.
Winter Wheels Without Sensors
The system cannot display pressure from a wheel that has no compatible transmitter. The warning may remain illuminated, and the monitoring function will not operate properly for that wheel set.
The temporary spare wheel is another example. According to the Meriva manual, it may not contain a pressure sensor, causing the warning to illuminate while the remaining monitored wheels continue operating.
Why the Vauxhall Meriva Tyre Pressure Light Will Not Reset
When the warning remains after correcting the pressures, work through the following possibilities.
The Tyres Are Not Actually at the Correct Pressure
Check them again with another gauge. One inflator may read differently from another.
Also confirm that you used the cold-pressure recommendation for your exact tyre size and vehicle load.
The Car Needs to Be Driven
Direct sensors transmit information under particular operating conditions. A stationary vehicle may continue displaying an old value until the system receives a fresh reading.
Take a normal drive before attempting more complicated fixes.
The Wrong Tyre-Load Setting Is Selected
If the system expects Max-load pressures while the tyres are set for Light-load use, its warning threshold may not correspond to the actual setup.
Match the menu selection to the pressure table.
A Tyre Has a Slow Puncture
Inflating a damaged tyre may extinguish the light temporarily, but the warning will return as air escapes.
Check the pressure again after several hours or the next morning.
A Sensor Battery Has Failed
Direct TPMS sensors contain internal batteries. These batteries are generally sealed inside the sensor rather than designed for simple household-style replacement.
Once a battery fails, the sensor assembly usually needs replacement and relearning.
A Sensor Was Damaged During Tyre Fitting
A tyre-changing machine can damage a sensor or valve if the operator does not account for its position.
If the warning began immediately after tyre work, ask the fitter to scan every sensor.
The Replacement Sensor Is Incompatible
Not every sensor operates on the correct frequency or protocol for every Meriva. Even a physically identical valve may fail to communicate with the vehicle.
Use equipment listed as compatible with the precise model and production year.
The Sensors Were Not Matched
New sensors do not always introduce themselves automatically. They may need to be activated in sequence with a relearn tool.
Electronic Interference Is Disrupting the System
The manual notes that nearby equipment operating on similar radio frequencies can interfere with tyre-pressure monitoring.
This is less common than incorrect pressure or a faulty sensor, but it can explain a temporary warning that disappears after the vehicle moves elsewhere.
A Repair Sealant Has Affected the Sensor
Some liquid puncture-repair products can interfere with sensors or contaminate their pressure ports. Factory-approved repair products are the safer choice where specified.
Tell the tyre technician when sealant has been used.
Can We Reset the Meriva TPMS Without a Tool?
For ordinary low-pressure correction, usually yes. Set the tyres correctly, select the correct load setting and drive the car.
For sensor-position matching, some later Meriva systems require a compatible electronic activation tool. Pressing dashboard buttons only places the vehicle into relearn mode; it does not necessarily trigger each wheel sensor.
A cheap tool can be useful for an owner who regularly swaps summer and winter wheels. Nevertheless, workshop equipment offers better diagnostic coverage when a sensor refuses to respond.
Common Mistakes During a Tyre Pressure Reset
Resetting Before Checking the Tyres
This treats the warning as an inconvenience instead of a safety message.
Always verify the pressures first.
Checking Warm Tyres
Warm tyres produce higher readings. Deflating them to the cold specification can leave them too low after cooling.
Inflating Every Tyre to the Same Random Number
Front and rear recommendations may differ. Load conditions can change them too.
Follow the vehicle label.
Using the Tyre Sidewall Number
The sidewall maximum is not the Meriva’s everyday recommendation.
Ignoring a Flashing Warning
A flashing-then-solid light indicates a system problem, not simply a pressure adjustment waiting to be acknowledged.
Starting Relearn Mode Without a Tool
You can enter the menu successfully and still fail the process because the sensors were never activated.
Matching the Wheels in the Wrong Order
The system expects the official sequence. Jumping from corner to corner can assign the wrong position or cancel the operation.
Assuming the Light Must Disappear Instantly
The system may need driving time to obtain fresh readings.
How Long Should the Reset Take?
A straightforward pressure correction takes around 10 minutes, excluding the time needed for the tyres to cool.
The display may update after a short drive. Depending on conditions, allow approximately 10 to 20 minutes of normal driving before deciding that the warning has remained permanently.
Sensor matching usually takes only a few minutes when every sensor responds correctly. The official procedure must be completed within its allotted time, making preparation important.
Have the relearn tool ready before entering matching mode.
Is It Safe to Drive With the Warning Light On?
That depends on why the light is illuminated.
Stop and inspect the tyres immediately when:
- The car pulls to one side
- Steering becomes heavy
- You hear flapping or thumping
- A tyre looks visibly flat
- The warning appeared after hitting a pothole
- Pressure is dropping rapidly
- The handling suddenly feels unstable
Do not continue merely to make the light disappear.
When all tyres are confirmed safe and correctly inflated but the system has an electronic fault, cautious driving to a workshop may be reasonable. You will need to monitor the pressures manually because the warning system may not be reliable.
When Should We Visit a Workshop?
Professional diagnosis is sensible when:
- The warning flashes before remaining solid
- One wheel shows no reading
- Sensor matching repeatedly fails
- The light began after tyre replacement
- A new sensor will not register
- The displayed wheel positions are incorrect
- Pressure falls repeatedly
- The valve stem is leaking
- A wheel or tyre is visibly damaged
- The system reports a fault code
- The light remains after correct inflation and normal driving
A technician can scan each wheel sensor, verify its identification code, check signal strength, test battery status and read stored TPMS faults.
That is far more useful than repeatedly clearing the menu and hoping for a different result.
How to Prevent Future Tyre Pressure Warnings
A little routine maintenance keeps the amber symbol from becoming a regular companion.
Check Pressures Every Two Weeks
Vauxhall recommends checking cold tyre pressures regularly and before long journeys.
Monthly checks are better than nothing, but every couple of weeks provides earlier warning of a slow leak.
Check Before Carrying Heavy Loads
Adjust the pressures and load setting before filling the Meriva with passengers, luggage or holiday equipment.
Return to the normal setting when the extra load is removed, following the vehicle label.
Inspect the Tyres After Pothole Impacts
A sharp impact can damage a sidewall, crack a wheel or disturb the tyre bead even when the pressure does not fall instantly.
Tell the Tyre Fitter That Sensors Are Installed
This encourages proper handling around the sensor valve and ensures new sealing components are used where required.
Relearn Sensors After Wheel Position Changes
Correct wheel identification makes future warnings easier to diagnose.
Vauxhall Meriva Tyre Pressure Reset Checklist
Before considering the job complete, confirm that:
- All four tyres were checked cold
- The pressures match the vehicle label
- The tyre size matches the listed specification
- No tyre has visible damage
- No valve is leaking
- The correct tyre-load mode is selected
- The warning does not flash at startup
- The car has been driven long enough to update
- Sensor relearning was completed after wheel changes
- The display identifies each wheel correctly
This checklist is simple, but it prevents most reset frustrations.
Final Thoughts on the Vauxhall Meriva Tyre Pressure Reset
The Vauxhall Meriva tyre pressure reset is not really about silencing a dashboard light. It is about giving the monitoring system accurate information and confirming that the tyres beneath the car are safe.
For a basic low-pressure warning, the solution is usually straightforward: check the tyres cold, inflate them according to the vehicle label, select the correct load setting and drive until the readings update.
When wheels have been rotated or sensors replaced, the process goes a step further. The car may need to enter matching mode, and every sensor must then be activated in the correct sequence with a compatible relearn tool.
If the light flashes, one wheel has no reading or the warning keeps returning, stop chasing the reset. The system is waving a red flag in amber clothing. Check for a leak, a damaged sensor or an electronic fault and arrange proper diagnosis.
Correct pressure protects far more than the dashboard’s appearance. It supports stable handling, predictable braking, sensible fuel use and even tyre wear. In other words, those few minutes with a pressure gauge can save money while helping the Meriva feel as planted and secure as it should.
Frequently Asked Questions
1. How do I reset the tyre pressure light on a Vauxhall Meriva?
Check and correct all four cold tyre pressures first. Switch on the ignition, press MENU on the indicator stalk, open the Vehicle Information Menu, find the tyre-pressure or tyre-load screen and select the correct setting. Press SET/CLR when confirmation is requested, then drive the car so the system can update.
2. Why is my Meriva tyre pressure light still on after inflation?
The car may need several minutes of driving before it detects the new pressures. The warning can also remain on because the wrong load setting is selected, a tyre is still low, a sensor has failed or the sensors need relearning after a wheel change.
3. Do I need a TPMS reset tool for a Vauxhall Meriva?
You normally do not need a tool after simply inflating a low tyre. A compatible relearn tool may be required after rotating wheels, replacing sensors, changing a complete wheel set or carrying out the sensor-position matching process.
4. What does a flashing tyre pressure light mean on a Meriva?
A warning that flashes for approximately 60 to 90 seconds and then remains solid generally indicates a TPMS malfunction. Possible causes include a failed sensor, depleted sensor battery, incompatible wheel or incomplete sensor matching.
5. Will disconnecting the battery reset the Meriva tyre pressure warning?
Disconnecting the battery is not the correct repair. It will not fix low pressure, a puncture, an incompatible sensor or a failed sensor battery. Correct the tyre pressures and diagnose the monitoring system properly rather than attempting to erase the symptom.
If you want to know other articles similar to Vauxhall Meriva Tyre Pressure Reset: Complete TPMS Guide you can visit the category Service and Parts.
Land Rover Defender 90 Tyre Pressure: Complete Guide
Land Rover Defender 90 Weight: Kerb Weight, GVW and Payload Explained
Land Rover Defender 90 Towing Capacity: Complete Guide
Land Rover Defender 90 Boot Space: Size, Dimensions and Practicality

Toyota Hilux Key Battery Replacement: Complete DIY Guide
Toyota Hilux Windscreen Replacement Cost: Prices, Factors, and Money-Saving Tips
Leave a Reply
More content of your interest